
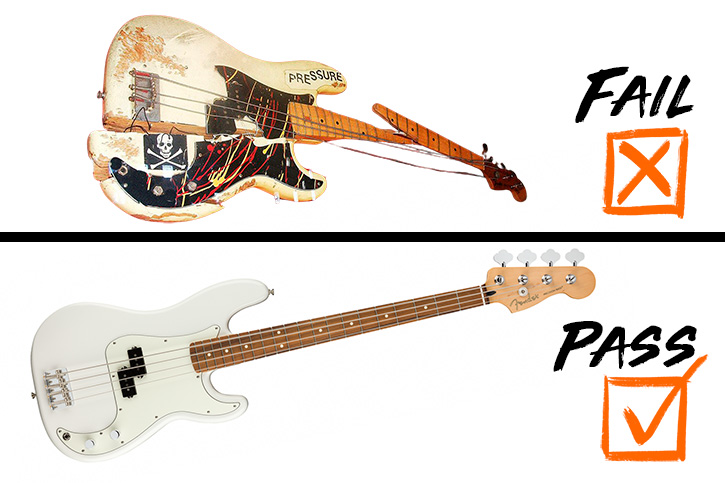
Any bass can play like crap if it isn’t set up.
It could be a brand new, super cheap bass you stumbled into with an impulse internet buy. It could be a shady back-alley Craigslist score. It might even be a super expensive, gorgeous bass that got all kinds of rave reviews on the internet.
Any bass of any vintage has the potential to play like absolute crap.
![]() Rusty strings.
Rusty strings.
![]() Dirty fretboards.
Dirty fretboards.
![]() Strings approximately one mile off the fretboard.
Strings approximately one mile off the fretboard.
![]() Rattles.
Rattles.
![]() Buzzes.
Buzzes.
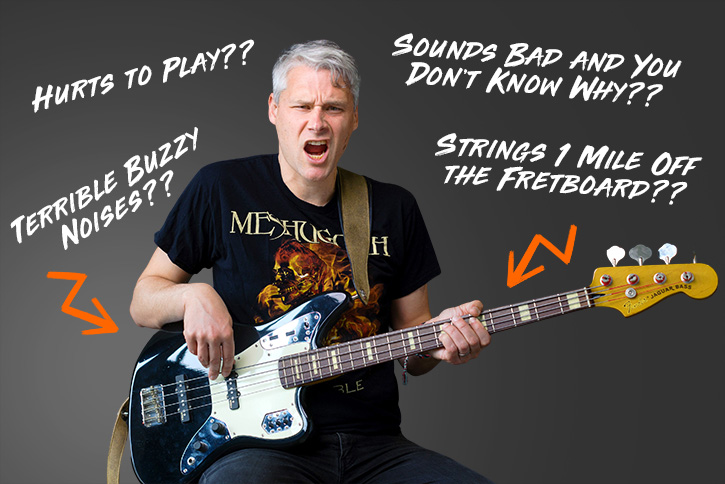
![]() Excruciating pains to your ears and fingers when you try to play.
Excruciating pains to your ears and fingers when you try to play.
I ask you, bass friend, is this the way it has to be?
Must we settle for basses that play like garbage and sound like s*#$?
No!
– You, yelling at your screen with your fist in the air
Must we settle for basses that hurt our toned forearm muscles and fingers with their ultra-high, unplayable action?
No!
– You, on your feet now, both fists in the air
That’s right!
No indeed!
The magic needed to take any bass, however cheap, however expensive, and get it playing in top form is a setup, and it is entirely possible for you to do it at home.
In this article, I’ll show you how to make your s%*##y bass play like a dream in 5 easy steps.
What’s a Setup?
A bass setup is the bass equivalent of a car tuneup. It is the way that you can figure out why your bass isn’t playing the way you want, and adjust it to your preference.
And, just like a car tuneup, every bass needs one at some point. It doesn’t matter if you paid $100 or $1,000 for the bass. There will be a point (you change to a new type of string, a change of season, it’s been left in its case for years, etc.) where your bass will need a setup.
![]() Buzzy notes?
Buzzy notes?
![]() Rattling notes?
Rattling notes?
![]() Not enough volume on certain strings?
Not enough volume on certain strings?
![]() Sound out of tune as you play in different places of the neck?
Sound out of tune as you play in different places of the neck?
![]() Strings so high off the fretboard you can barely push them down?
Strings so high off the fretboard you can barely push them down?
These are a few of the symptoms that you can fix with a decent setup.
![]() Smooth playing?
Smooth playing?
![]() Clear tones?
Clear tones?
![]() Perfectly in tune notes?
Perfectly in tune notes?
![]() Comfortable, effortless fretting?
Comfortable, effortless fretting?
![]() More friends?
More friends?
![]() Popularity?
Popularity?
![]() Fame and Fortune?
Fame and Fortune?
![]() Inner Peace?
Inner Peace?
These are some of the benefits of a decent bass setup.
There are 5 things to adjust.
You will not damage your bass so long as you follow these instructions.
Make sure you go through these 5 steps in order, as each one will affect all others. If you go in order, you shouldn’t have to go back and re-do anything. Instead, it will be a smooth conveyor belt of bass health and wellness.
What You Need
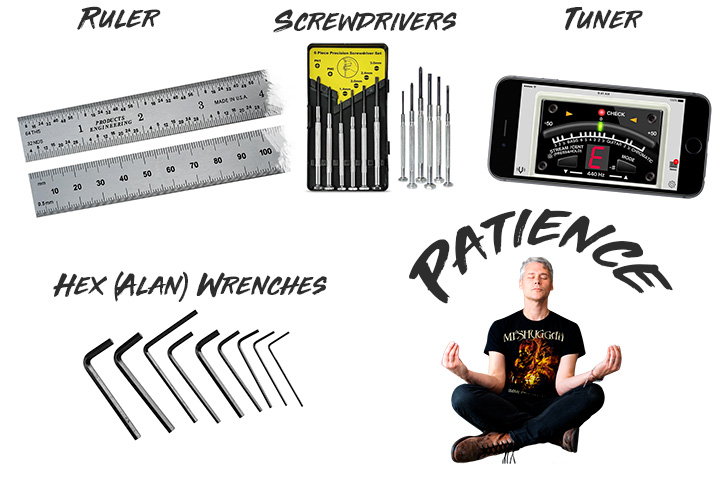
![]() Ruler
Ruler
![]() Screwdriver (most use Philips, some use flat – smallish, but not eyeglasses small)
Screwdriver (most use Philips, some use flat – smallish, but not eyeglasses small)
![]() A couple Allen wrenches (hopefully they came with your bass, otherwise you’ll have to mix and match with what you have till you find the one that fits)
A couple Allen wrenches (hopefully they came with your bass, otherwise you’ll have to mix and match with what you have till you find the one that fits)
![]() Tuner
Tuner
![]() Patience
Patience
#1Trussrod
The TRUSSROD is the metal rod that is hidden in the neck of your bass. It balances the pull of the string tension.
If the trussrod is not set up properly, it can do one of two things:
- If the trussrod is too loose, the strings will be so far off the fretboard they become very difficult to press down.
- If the trussrod is too tight, you’ll hear gnarly buzzing on lower frets instead of clear, clean notes.
Step 1 is to tweak your trussrod to get just enough forward bow in the neck for buzz-free playing.
How to Check the Trussrod
To check and see if your truss rod is properly adjusted, follow these 3 easy steps that I call The Trussrod Test Trifecta. Or, the T3. Or T3. TTT. If it was a workout regimen, I’d call it the Tx3! Bam!
But… it’s a setup process for your trussrod. So.
Lemme get focused.
The Trussrod Test Trifecta.
Go.
Step #1
Hold Down ![]() 1st Fret
1st Fret
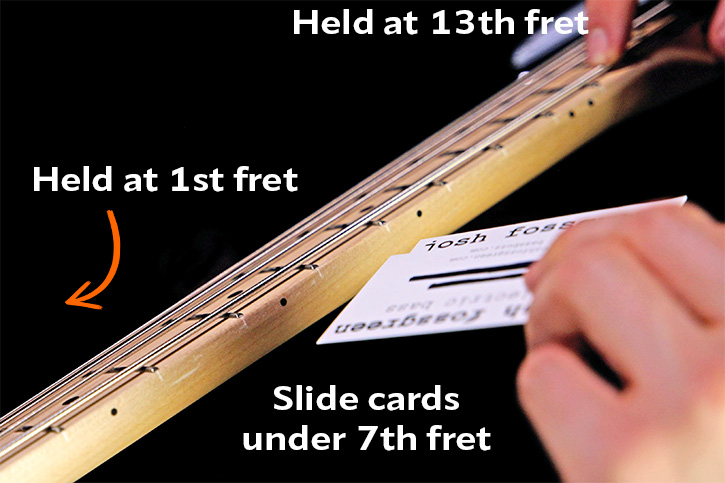
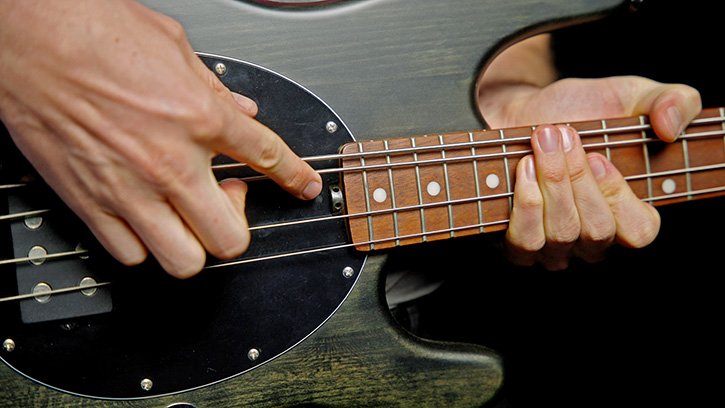
First, hold the bass in playing position (very important that it’s in a playing position and not lying on a table or workbench) and press the E string down right behind the 1st fret wire.
You can use a capo if you have one, or just wedge in a big triangle pick, a ruler, or any thin and fairly rigid object.
Step #2
Press Down ![]() 13th Fret
13th Fret
Second, press down the E string with your plucking hand past the 12th fret wire (on the 13th fret).
Step #3
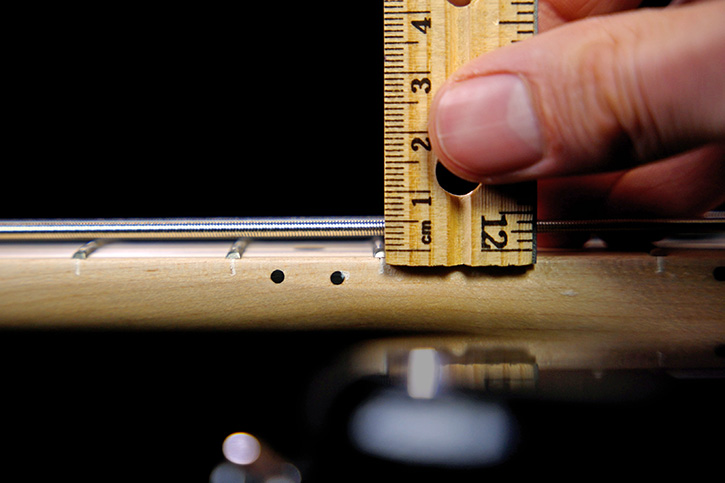
Measure the ![]() Gap
Gap
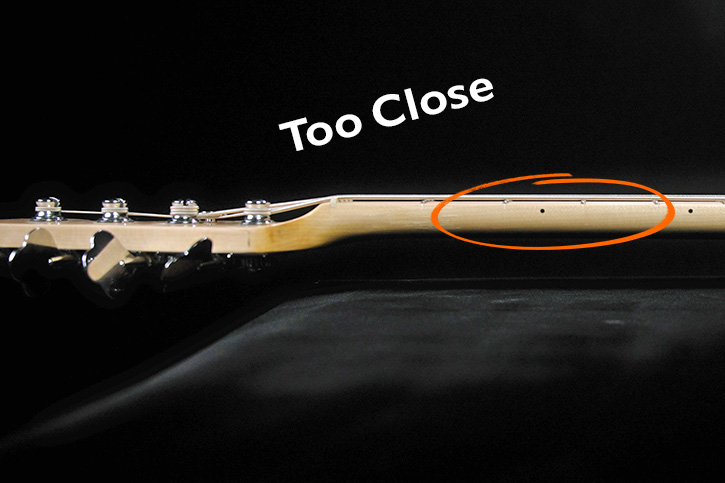
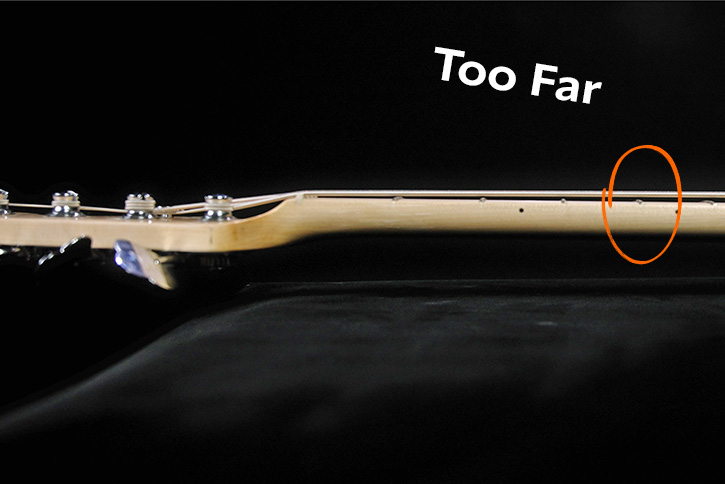
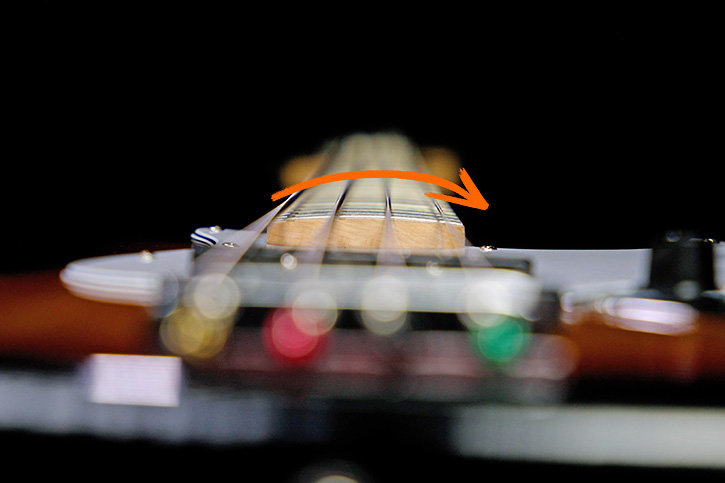
And third, check the trussrod status by measuring the gap between the E string and the 7th fret wire.
(If you used one hand each for the 1st fret hold and the 13th fret hold, you may realize you’re out of hands. Either find something else to hold that 1st fret, or recruit a nearby person to do some fret holding. You need to check on that gap, and you need a hand to do it with.)
You can use a normal business card to measure for the right gap, just slide it between the string and the fret wire.
If the business card won’t slide between the string and fret wire, the string is too close to the fret, which means the neck is too straight and you’ll need to loosen the trussrod to let it bow forward more.
If there’s more than 1-2 business cards of clearance, there’s too much forward bow in the neck and you’ll need to tighten the trussrod to straighten it out.
Alternate Option Step #3
![]() Tapping
Tapping
Alternate third step, instead of the business card method, you can tap on the 7th fret lightly with your finger.
You should hear a little clicking sound.
If you don’t hear anything, the string is already touching the fret, which means the neck is too straight and you need to loosen the trussrod.
If there’s a lot of string travel and a lot of clicking sound, there’s too much forward bow in the neck and you need to tighten the trussrod.
How to Loosen and Tighten the Trussrod
Before we jump into this whole “just use some household tools to crank away on your precious musical instrument” business, I need to let you know something. I used to be terrified of trussrod adjustments. Really, any bass manipulation of any kind.
But if you don’t act like an idiot, trussrod adjustments are super safe and easy. Likewise, all these setup bits.
So relax, take a deep breath, and let’s go to town on that precious bass of yours.
How do you loosen or tighten the mysterious, hidden trussrod?
Three steps again.
Step #1
Find ![]() Trossrod Access
Trossrod Access
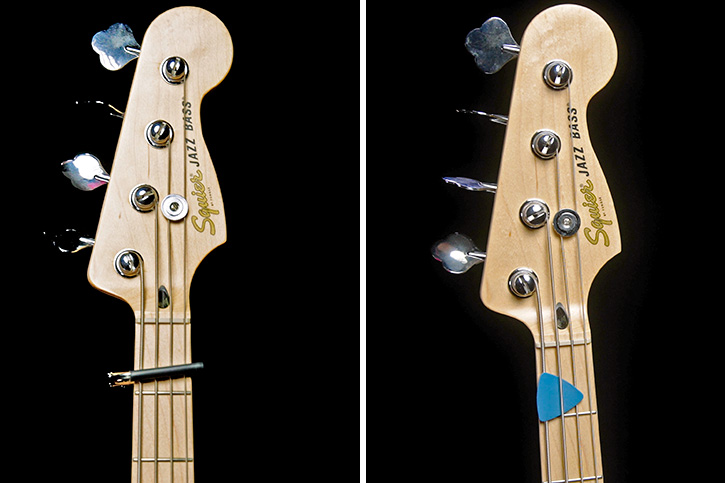
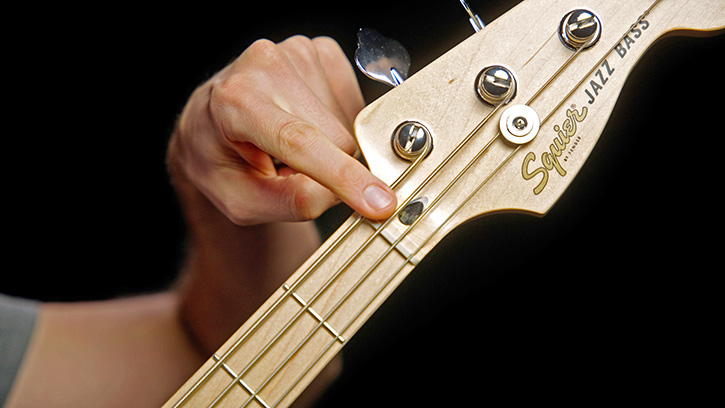
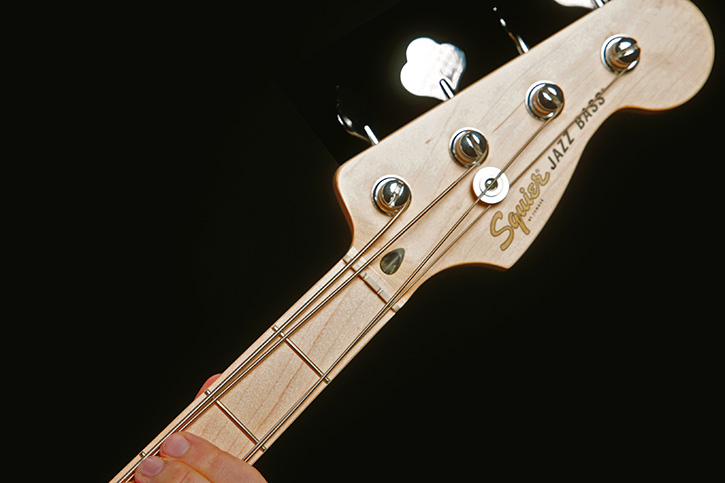
First, find where your trussrod adjust is.
It might be on the headstock, pointed toward the body, nestled between the A and D strings. There’s usually an access point where the headstock meets the neck – like on a Fender P-bass. (Some basses will hide this opening under a little plate. Just unscrew that plate to find the trussrod adjust.)
It might be at the body end of the neck, like on a MusicMan. (Those particular basses have a wheel adjust system.)
And if you’re unlucky enough to have a vintage style neck like some old or reissue Fenders (like me!), you may have to remove the pickguard or actually remove the neck to access the adjustment.
I pray, for your sake, that this is not the case.
Depending on where the trussrod is on your bass, you may need to loosen a couple strings to get access. For example, on the P bass and similar basses where the trussrod access is between the A and D strings on the headstock, loosen the A and D strings to allow access and turning action for your Allen wrench.
Step #2
Find Appropriately Sized ![]() Wrench
Wrench
Second, find the thicker Allen wrench that came with your bass – or find an Allen wrench that fits perfectly.
Just make sure there’s no wiggle at all because you really don’t want to strip the nut.
Step #3
Tighten ![]() or Loosen
or Loosen
The third and final step is to tighten or loosen your trussrod based on how your check went.
Either way, start this step by loosening it an eighth turn at first, to de-stick it, then turn back to where you started.
If you found you had too much forward bow in your check, you’ll need to tighten the trussrod by turning clockwise.
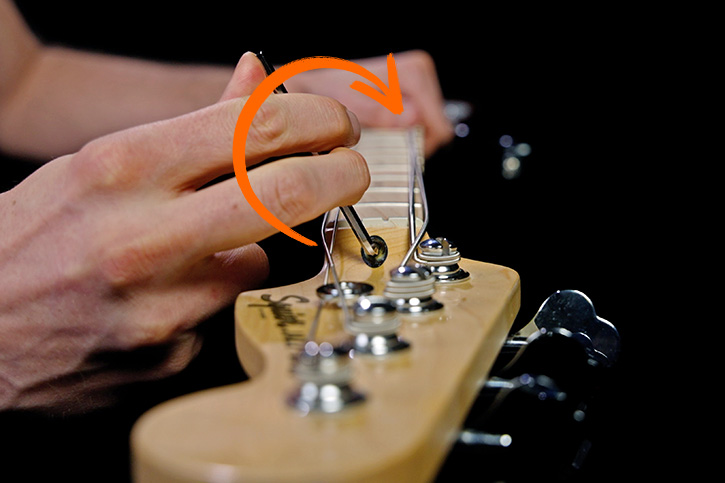
Do this an eighth turn at a time, it doesn’t take much.
Using fairly firm pressure is normal, but if you force it or make huge turns you can cause problems.
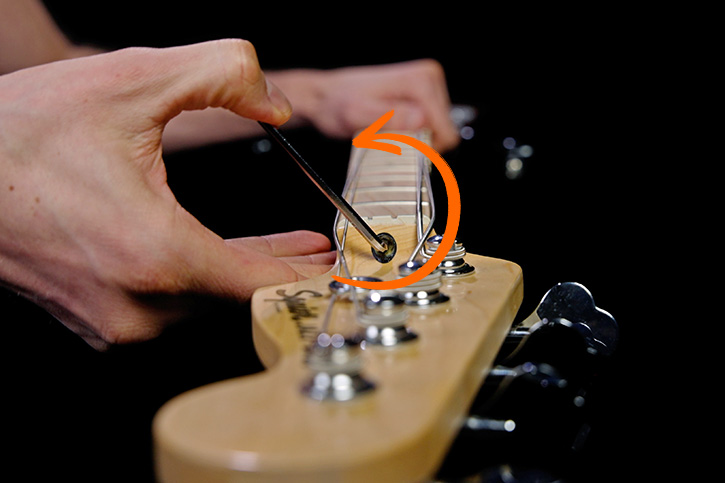
If you didn’t have enough bow and the neck was too straight in your check, loosen the trussrod by turning counter-clockwise, again just an eighth turn or so to start.
Now you need to tune back up, and recheck the trussrod using The Trussrod Test Trifecta.
![]() Your bass ALWAYS needs to be in tune before you take any measurements.
Your bass ALWAYS needs to be in tune before you take any measurements.
And remember to check the trussrod and everything else in playing position, meaning the orientation your bass is in while playing, not laying on a workbench.
If you’re getting 1-2 business cards of clearance now, your trussrod is all set.
If it’s still off, you might need to try another eighth turn or two.
Trussrod tweaks take some hours to settle in, so make small adjustments and measure again later for fine tuning.
I may not have mentioned this explicitly at the beginning… but if you want this to be a very fast process, prepare for a very bad setup.
You may have to go through these steps multiple times.
Relax.
Take a deep breath, put on some sweet bass jam tunes, and dig in for the long haul.
The trussrod is the critical first step, but you probably won’t see much difference in how your bass feels until you finish step 2:
#2Bridge Saddles
So you’ve dialed your trussrod. You’ve also listened to some sweet bass jams. The bass vibes are strong with you.
However… no matter how strong the vibes may be, if your bridge saddles aren’t set properly, your strings might still be rattling against your fretboard or soaring miles above the neck.
We gotta adjust those mammajammas.
Get this right (in a power combo with your freshly adjusted trussrod), and you’ll be playing on strings right where you want them: enough height that you can pluck dynamically without buzz, while still being close enough to the neck that it feels good to play.
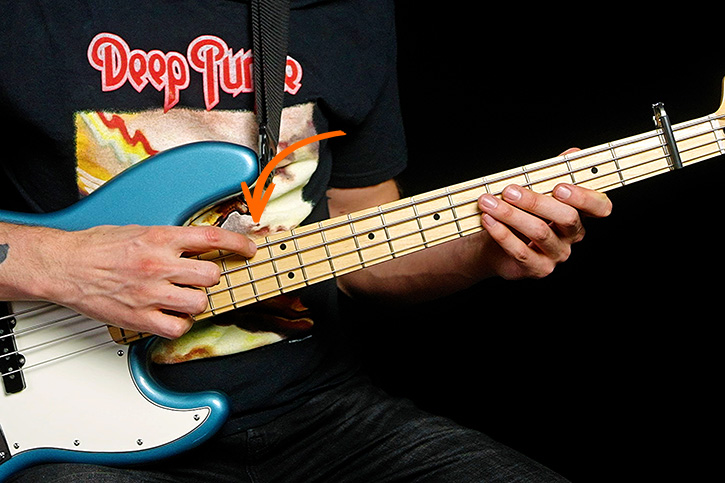
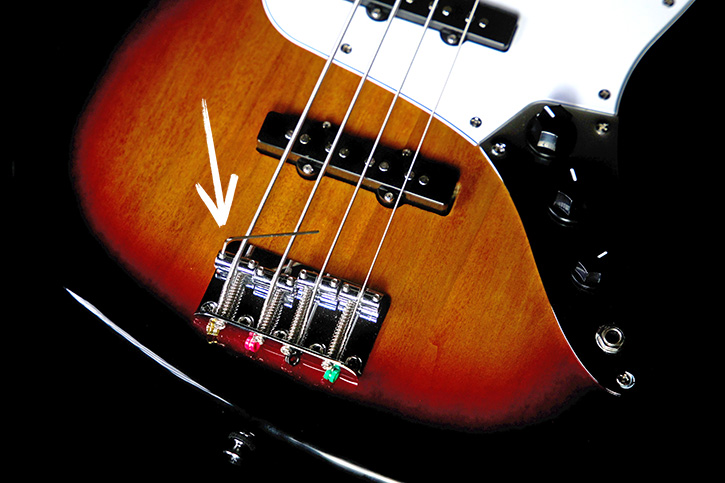
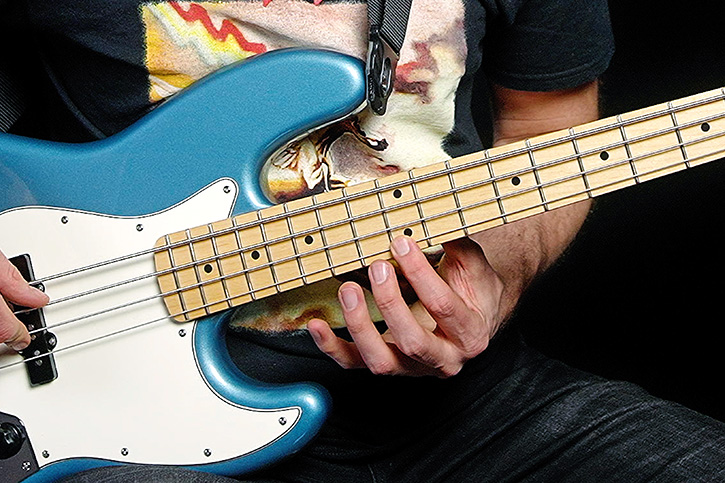
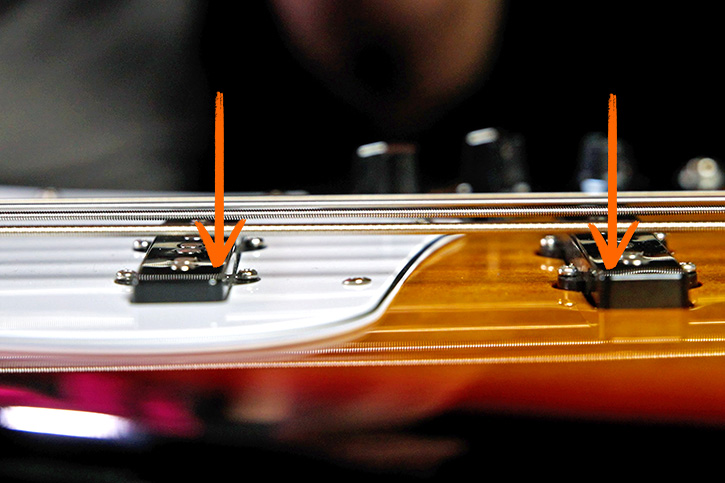
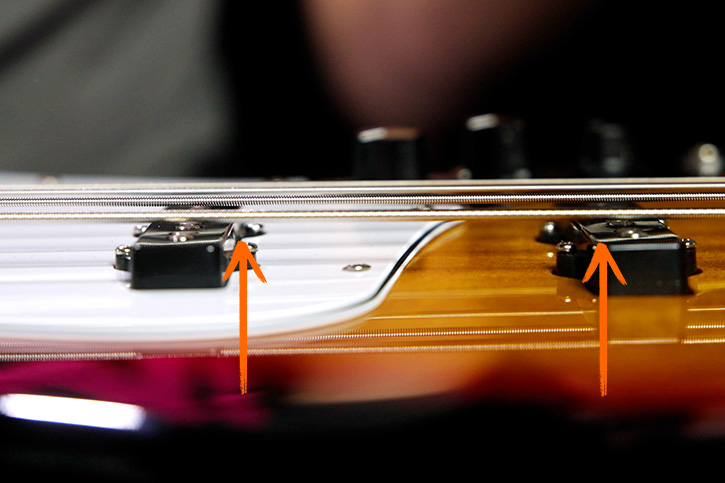
Bridge saddles are these lil guys:
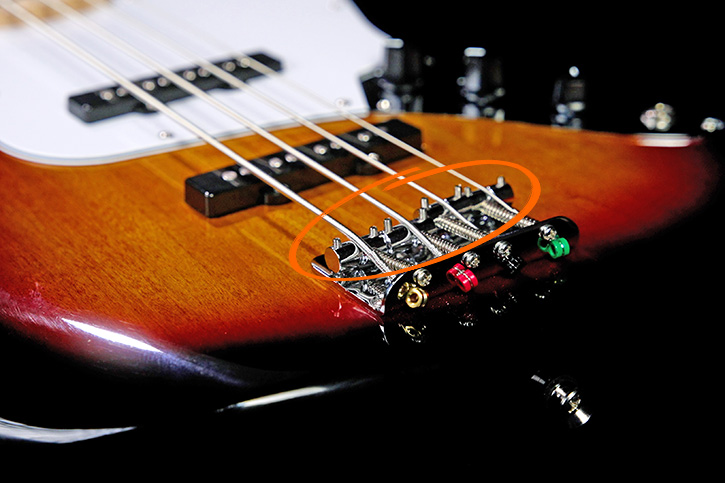
They determine your action.
 Action just means how FAR the strings are from the fretboard.
This is also determined by the trussrod, but the easiest and most direct adjustment to your action is usually here at the bridge saddles.
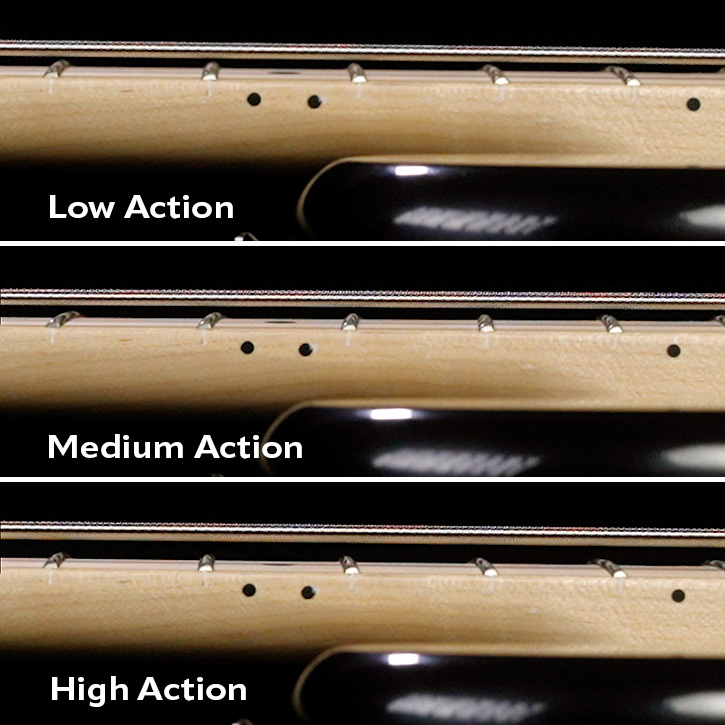
So what kind of bass action do you want?
- With low action, the strings are super close to the neck, and you have to play with a very light touch to avoid buzz.
- With high action, the strings are further off the fretboard and more work to press down, but you have a lot more bandwidth for plucking volume.
For me as a bass teacher, I’d like you to learn on something like MEDIUM action, where the strings are close enough to the neck that they’re easy to press down, but not so low that you get buzzing if you pluck hard.
So how do you check your action?
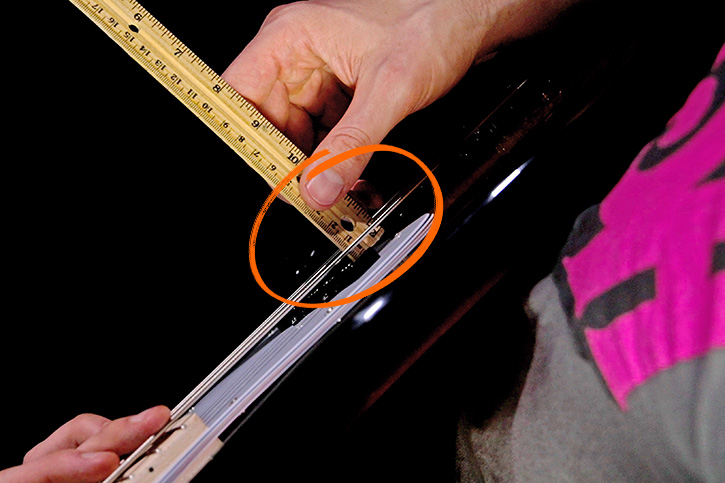
First, put the bass in playing position and fret or capo at the 1st fret.
Now grab your ruler and measure from the top of the 12th fret to the bottom of the E string.
Something like a 2-3mm (or around 3/32” inch for us Americans) gap on the E string is a good medium action starting point.
You can also check the G string while you’re at it. It’s OK if this measurement is very slightly lower since the string is smaller.
Just make a mental note at this point whether your strings were too high or too low. (You’ll have to adjust your saddles and then come back and re-measure. You can’t do both at once.)
Remember that the order of these setup steps is important!
![]() Your trussrod adjustment will affect these measurements, so get that set before you work on the bridge saddles!
Your trussrod adjustment will affect these measurements, so get that set before you work on the bridge saddles!
Adjusting the bridge saddles is pretty easy. I’ll break it down to another three step process:
Step #1
The ![]() Smaller Allen Wrench
Smaller Allen Wrench
Find the smaller Allen wrench that came with your bass, or find one that fits the bridge saddles.
Step #2
![]() Bridge Design
Bridge Design
Figure out how your bridge saddles like to be adjusted, there are different kinds of bridge designs.
On this super simple Fender-style bridge, the Allen wrench just goes straight in.
On some fancy bridges (like on Josh’s Peavey Cirrus), you might need to loosen a locking screw before you adjust.
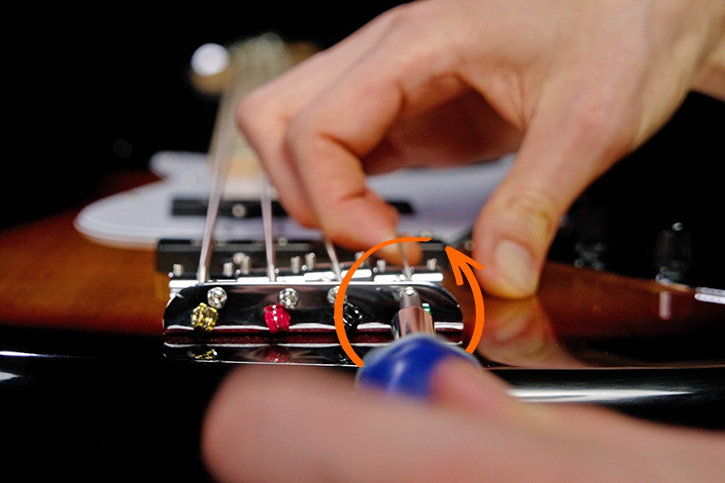
Step #3
Make the ![]() Adjustments
Adjustments
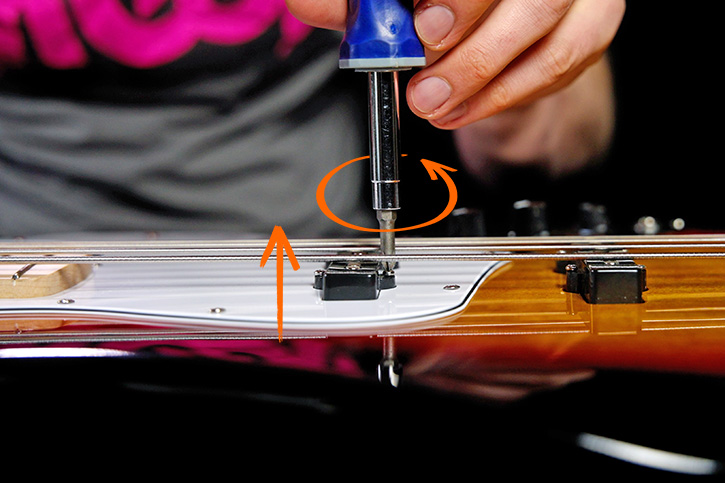
If your E string was too low, you want to turn clockwise, which drives the screw further down into the bass, raising the saddle.
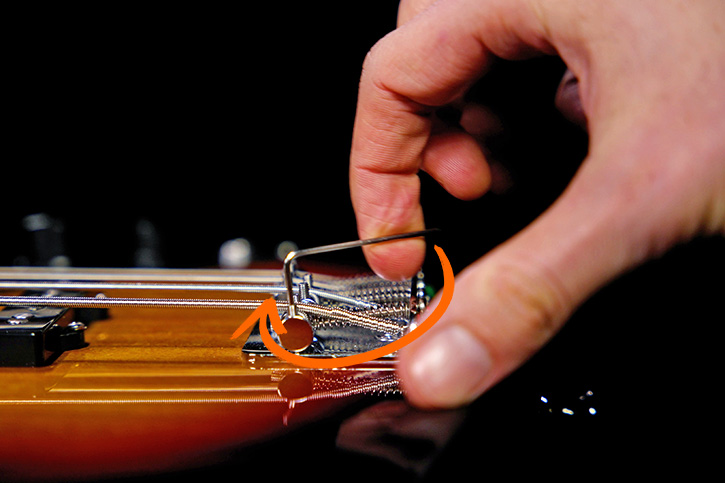
If your E string was too high, turn counterclockwise, which pulls the screw up and lowers the saddle.
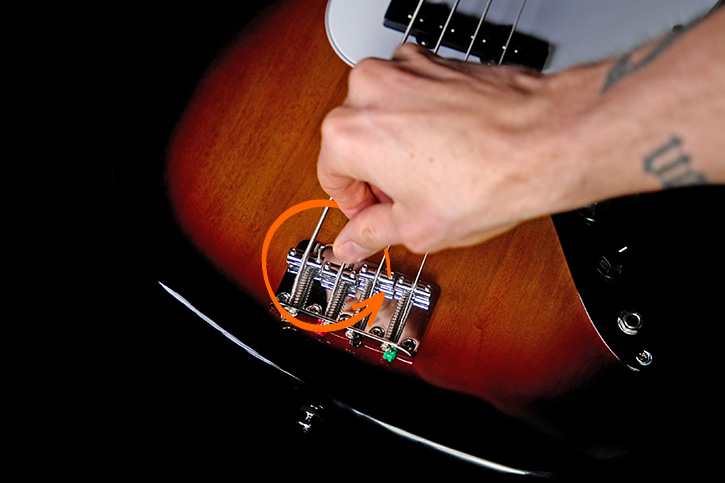
Adjust something like a quarter or half turn at a time
And keep the bridge saddles even: if you do a half turn on one side, do a half turn on the other.
![]() Before you check your adjustment, make sure your strings are in tune!
Before you check your adjustment, make sure your strings are in tune!
Just like with the trussrod, you need all your setup checks to be done with your bass perfectly in tune, as every adjustment is going to be messing with your strings in some way, shape or form.
Once you’re in tune, fret at the 1st fret and measure again, just like you did before.
Once you’re in that 2-3mm range (3/32” for us Americans who just hate the sweet simplicity of millimeters), try plucking every fret on that string at a medium hard intensity.
You’re looking for rattle free notes.
- If a note rattles, make sure you’re pressing just behind the fret wire and with enough pressure, so that you can ensure it’s not poor fretting technique that’s making the buzz.
- If you’re consistently getting buzz on multiple frets, you need to raise the action a bit.
- If everything sounds clean and the string is a comfortable distance from the neck, you’re done.
- If it’s clean and you want to try dropping the action lower, you can – just remember to retune before checking every time so the string has the right tension.
Once you’re happy with your E string, repeat this process for the G string, and then dial the A and D strings.
Because there’s a slight curve to the fingerboard of a bass, the inner strings, the A and D strings, should be a tiny bit higher than the outside strings, the E and the G.
Again, allow me to interrupt to first commiserate with how much patience, re-tuning and adjusting this takes. I am not, despite what Fugazi may have said, a patient boy.
Once your bass is playing like a dream, you’ll need a solid beginner bass course to work through to really put that instrument through its paces. Luckily for you we have a killer beginner bass course. Check it out!
#3Nut
Your trussrod is set, your bridge saddles are adjusted and your strings are – finally – where you want them to be. Huzzah!
And yet, your work is not yet done.
You have to check the nut.
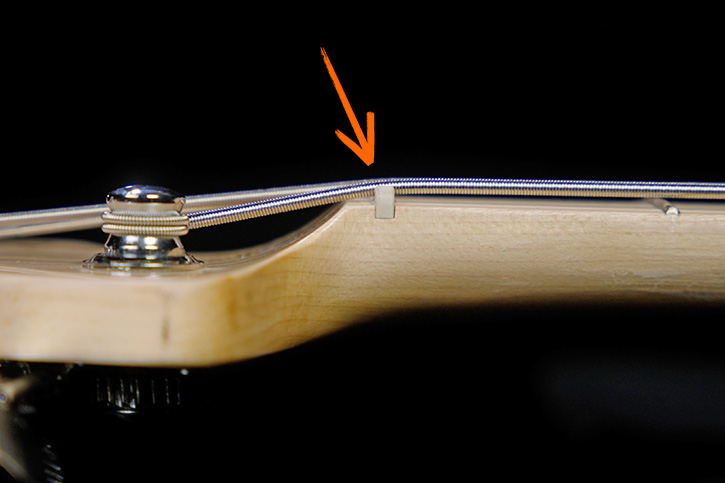
The nut is that thingummy that holds all of the strings just where the neck meets the headstock. You need to check the nut to ensure that your open strings have the right amount of clearance.
If the nut slots are too low, you’ll get buzzy rattly open strings.
If the nut slots are too high, it messes with your action and intonation (and setting the intonation is our next step).
This is the slightly wonky part of the 5 step setup, because if your nut is f*cked, there’s not actually a whole lot you can do about it, unless you’ve got special tools.
Sorry.
But it’s still worth diagnosing so you know if you need to take it to a pro.
Checking your bass’s nut height is easy.
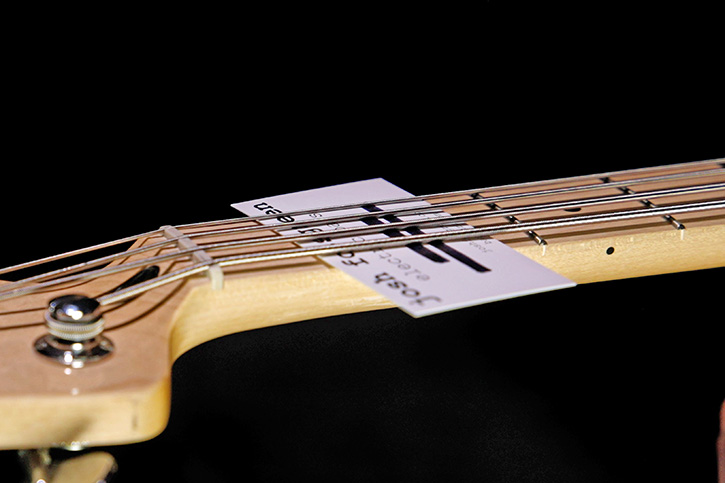
Hold the bass in playing position, grab that business card again and without fretting anything, slide it between the strings and the 1st fret wire.
If it slides in perfectly under all the strings, you’re golden.
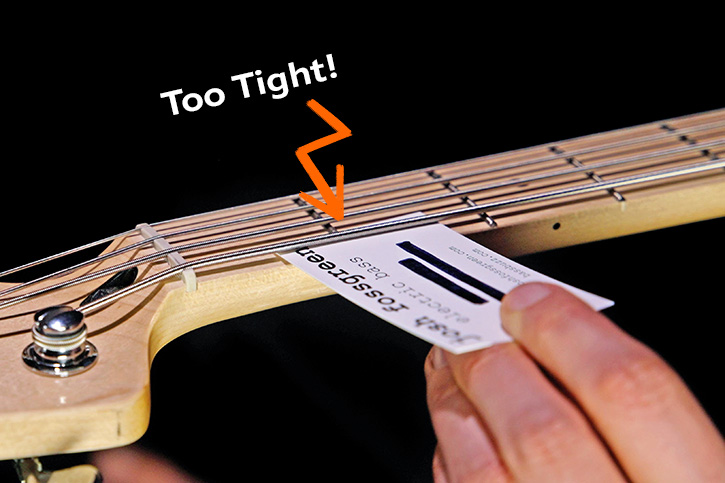
If it’s too tight to fit under any given string, that string’s nut slot is too low. Better check that string!
If the open string doesn’t rattle when you play it (even though you couldn’t slide a business card under it), it’s not actually a problem. Hooray! Bullet dodged!
If it does, you need some pro assistance. Good luck, and Godspeed.
If there’s a lot of clearance between the string and the card, the nut slot is too high and needs to be recut, which requires special files and knowhow. Again, take it to a pro.
Your bass’s action is now dialed.
You’ve done everything you can do to set the trussrod, bridge saddles and nut to get your bass playing like a dream with your strings just where you want them.
Now.
Let’s make sure you go off with your sweet, sweet action sounding good and not like an out-of-tune idiot.
#4Intonation
So frets are a really handy thing.
They make it so you can ONLY play in-tune notes, no matter where you put your finger on the neck. (This is the kind of thing that fretless players and upright players dream about but will never admit to.)
BUT!
![]() Frets only work right if the string is exactly the right length, and those frets are placed against the string in the EXACT right place
Frets only work right if the string is exactly the right length, and those frets are placed against the string in the EXACT right place
The premise of frets is that the distance between the nut and the bridge saddle is the effective length of the string. In order for your frets to make the perfect, in-tune note that you want them to – all over your fretboard – you need to make sure that the 12th fret is set exactly halfway along the string length.
We do not do this with a ruler.
We do this with (swell noble, mysterious, triumphant music) the power of music!
To dial in (ahem) impeccable intonation (thank you), we will make position adjustments to your individual bridge saddles, setting the string length of each string so as to ensure perfectly in-tune notes everywhere on your bass.
I’ll explain. (Gio swirls his cape as the music swells again).
But first – remember that you need your trussrod, saddles, and nut all set FIRST. Each of the previous steps will make small but absolutely critical changes to your string length.
That’s why this step comes fourth.
So how do you check your intonation?
Step #1
Grab a ![]() Tuner
Tuner
First, plug into a decent tuner and tune your open string, we’ll start with the G but it doesn’t matter which string you choose.
Make sure the open string is perfectly in tune.
Step #2
![]() Fret!
Fret!
Second, fret the 12th fret note, which should be a G, and see if it is in tune on your tuner.
Make sure you don’t bend the string with your fretting finger!
Step #2.5
Fret Some ![]() More!
More!
Step two point five, I also like to check the 19th fret to get another data point.
On the G string, that should be a D.
So again just fret without bending, pluck at a medium volume, and check the tuning.
If the open string, 12th fret and 19th fret are all in tune – your intonation is spot on for that string. Congratulations. Treat yourself to a nice cup of strong coffee. Or maybe some gummy bears. It doesn’t have to be either of those things. You choose.
If, however, after tuning the open string to a perfect G, the fretted notes were flat, you’ll need to make the string length between the nut and saddle shorter. By bringing the saddle toward the 12th fret, you will shorten that string length, which will raise the effective pitch, which will allow your frets to play in tune.
If the fretted notes were sharp, you’ll need to make the string length between the nut and the bridge saddle longer. By moving the saddle away from the 12th fret, you’ll make the string length longer, lowering the pitch which will get your bass in tune.
This both confounded me and blew my mind when folks tried to explain it to me. It’s a little weird, and may take time for it to make any sense at all. It’s fine if it doesn’t make sense. You can still set the intonation by following these instructions! Don’t stress.
Grab a delicious beverage of your choice (espresso) and, to quote a great pilot, stay on target.
So how do you actually, physically adjust intonation?
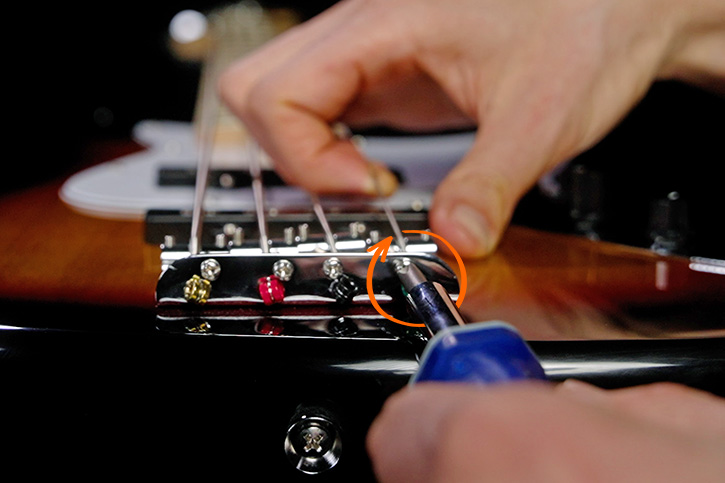
Step #3
Adjust the ![]() Saddles
Saddles
On most bridges, it’s just a simple Phillips-head screw that you turn to scoot the bridge saddle backwards or forwards.
If your fretted notes were flat, you need to loosen the screw, counterclockwise. This will move the saddle towards the 12th fret, making the effective string length shorter.
If your fretted notes were sharp, you need to tighten the screw, clockwise. This will pull the saddle away from the 12th fret, making the effective string length longer.
Lift or loosen the string as you adjust to help the saddle move without so much downward pressure from a tightened, in-tune string. If you try and move them while the string is holding them down, you can scrape up your bridge.
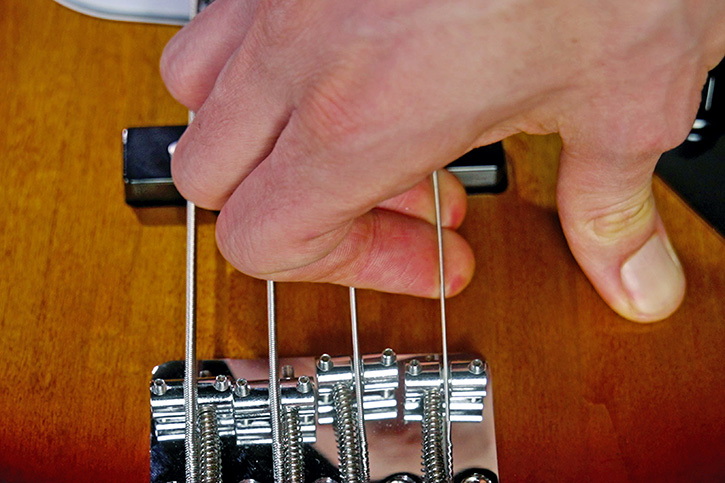
After adjusting, you might need to tap the end of your screwdriver while still in the screw head to make sure the head of the screw didn’t lift away from the bridge.
Every time you make an adjustment, recheck the tuning of the open string before checking the fretted notes. You have to make these adjustments with a perfectly in-tune open string or it’s all for naught!
And, again, don’t bend the string when you fret, ya dingus.
So:
- adjust,
- tune,
- check your fretted notes,
- and then keep adjusting until they’re all perfectly in tune.
And then repeat this whole process for the rest of your strings.
Don’t be surprised if it takes a few rounds per string.
Again, you have my commiseration and sympathy, as I am not patient in these ways. Don’t lose hope!

If you’re tired of setting up your bass and just want to start learning to play, check out our absolutely free Kickstart Course.
OK.
Steps 1-4 are complete.
Your bass is almost in dream mode.
There’s just one last piece to make sure it actually sounds good out of the amp…
#5Pickup Height
Everything we’ve adjusted this far has affected how your bass feels to play, and we just made sure that every note on every fret on every string is ringing out pure, sweet and in tune.
All is right in the bass world.
But… what if your bass still sounds like poop when your perfectly set up notes come out the amplifier?
We need to adjust the pickup height.
If your pickups are set too low (too far from the strings), your tone will be wispy, light and weak.
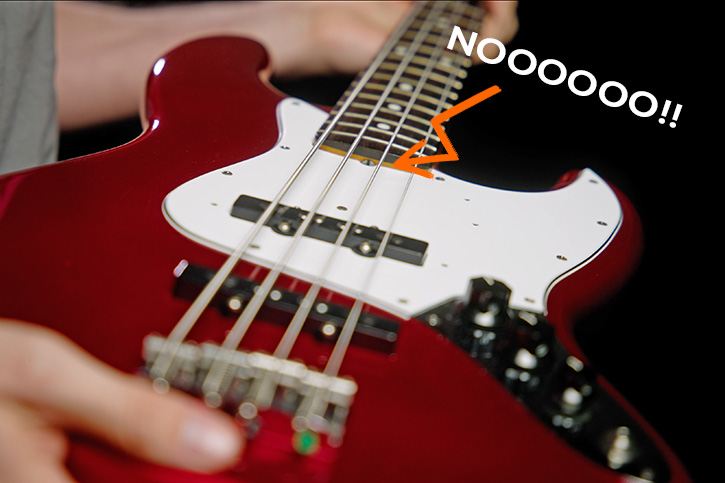
If your pickups are set too high (too close to the strings), your sound could be blown out, distorted, and you risk summoning the dreaded “string-against-the-magnet-Clack-of-Doom”.
You don’t want the Clack Of Doom.
Step 5 – the final step – is to set your pickup height to achieve the best balance of tone and volume for your playing style.
Pickups are the magic blocks, created by wizards to transform the vibration of the strings into amplified bass sorcery.
Some people say it has to do with magnets and wires…
…the preferred equipment of wizards and sorcerers!
Sorry. Bass player here, not an engineer… and I love D&D.
So, where should you set your pickup height?
Here are the guidelines:
- Closer to the strings you’ll get more volume, more treble, less sustain.
- Farther from the strings and you’ll get less volume, less treble, and more sustain.
The “right spot” is a matter of personal taste and playing style, as long as the volume output is decent and the strings aren’t banging into the pickups.
You can start by checking your pickup height against the manufacturer’s specs, which for my Fender bass is 3/32″ on the E string side and 5/64” on the G string side, or 2.5mm E string side, 2mm G string side.
(I really hope you have a ruler with millimeters. I’ve never seen a ruler with 32nds let alone 64ths.)
To measure that, press down the string at the last fret, and measure from the top of the pole pieces to the bottom of the string.
With pickup height, manufacturer specs are just a starting point, and you can even skip that step if you want to.
Just start with one pickup at a time (if your bass has more than one). I like to start with the neck pickup on a Jazz bass.
Play as heavy as you might play.
Check for slapping if you like to slap too.
If you’re getting any distortion, or the strings are hitting the pickup, try lowering the pickup by tightening the screws.

If it sounds super quiet and feels too far away, raise the pickup by loosening the screws.
You may have one side of your pickup higher than the other in order to get a balanced, even sound across all your strings.
Make sure that you’re playing across all the strings when you’re checking this, and you’re paying attention to the height on the E string and G string side!
Once you have one pickup set, turn its volume off. Then solo and adjust your second pickup. Your goal is to have even-ish volume when you solo the two pickups back and forth.
If you have a two pickup bass, make sure you test them blended together and see how you like the sound.
Again, as long as you have decent volume and the strings aren’t banging the pickups, you really can’t get this ‘wrong’.
Special note if you have a split pickup like on a Precision bass.
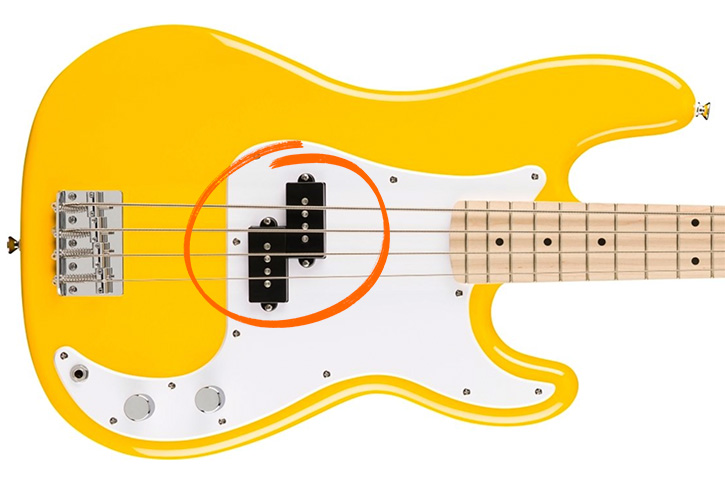
These two chunks are just one pickup. I sometimes hear from students who think they have two pickups on their Pbass. It’s just one pickup, split for your convenience!
This style pickup is designed to match the curvature of the fingerboard, so it needs to be slightly angled to get even performance across all the strings.
Conclusion
Once you’ve set your pickup height, your bass setup is complete.
You have, to borrow a phrase, taken your first step into a larger world.
If this work speaks to you and puts you in your happy place – good news: your friends and musical neighbors will pay you money to do this to their instruments.
Whether you hang a “Bass setups here” sign in your window or not, in going through this article and this process you have grasped the power of controlling, knowing and shaping your bass for your own personal tastes and style.
Now, take thine Thunder Stick (as my old bass professor would call these things) and go forth. Make thunder. Play bass.
 Beginners Course
Comments
Got something to say? Post a comment below.