
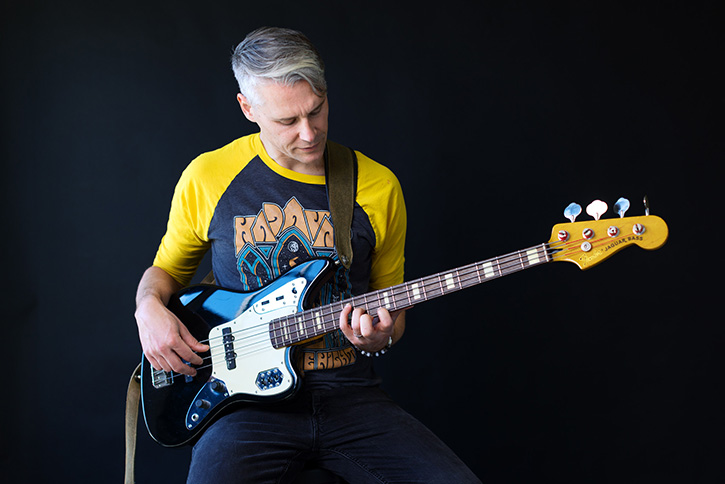
If you’re the internet searcher who just wanted some bass chord shapes, here you go.
What You’ll Learn
In this article you will learn:
![]() 12 practical and useful chord fingerings.
12 practical and useful chord fingerings.
![]() Real songs that use these chords.
Real songs that use these chords.
![]() Effective chord plucking/strumming techniques.
Effective chord plucking/strumming techniques.
Onward.
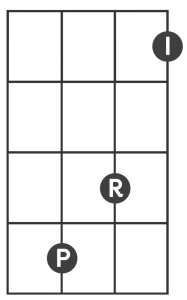
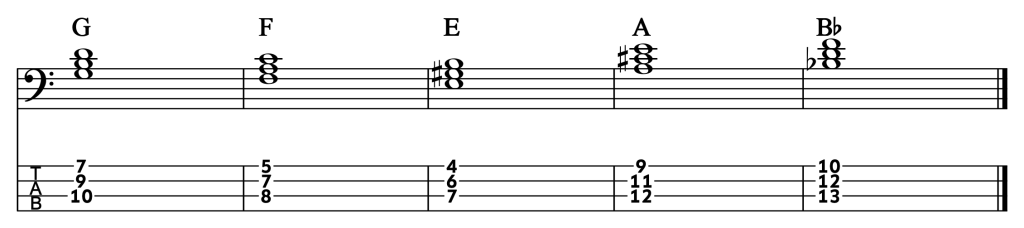
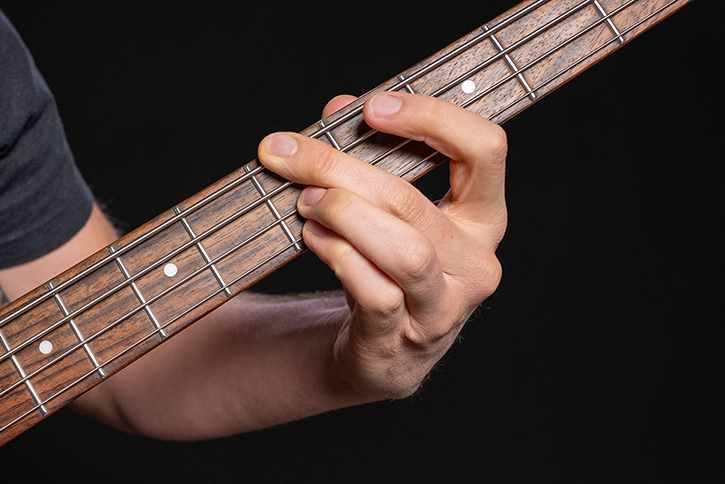
#1The Power Chord
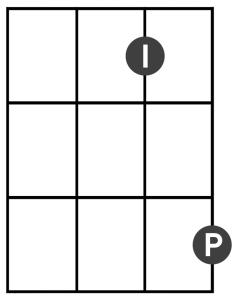
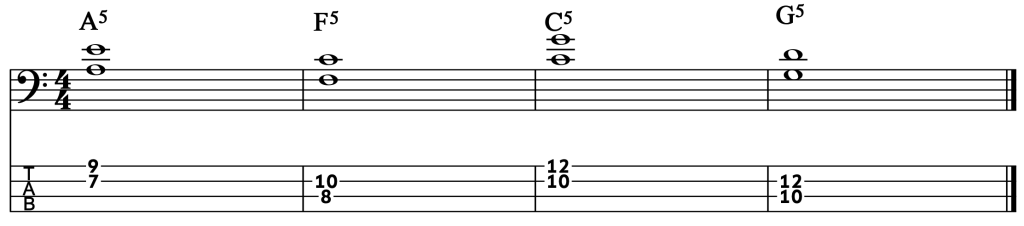
If you have any trouble getting the chords to sound good, you may need to adjust your technique. Technique tips and advice are at the very end of this article.
Songs that use power chords
Don’t Forget Me ![]()
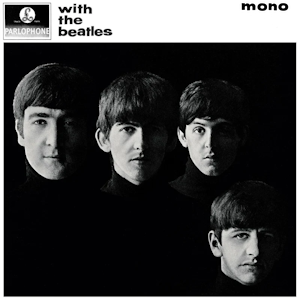
All I’ve Got to Do ![]()
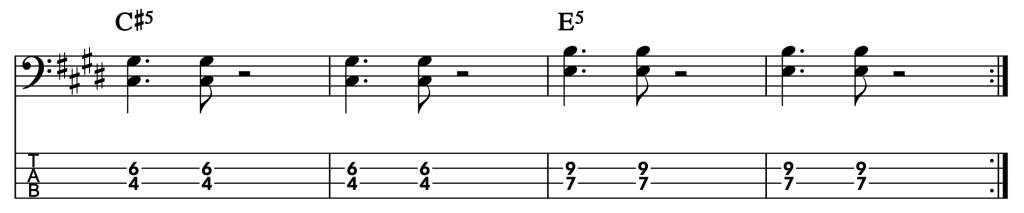
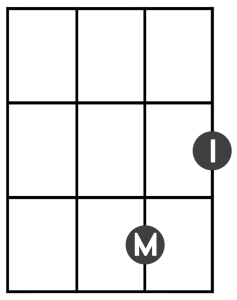
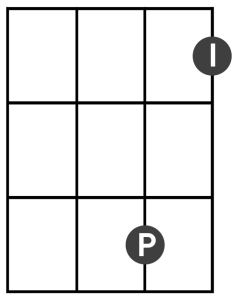
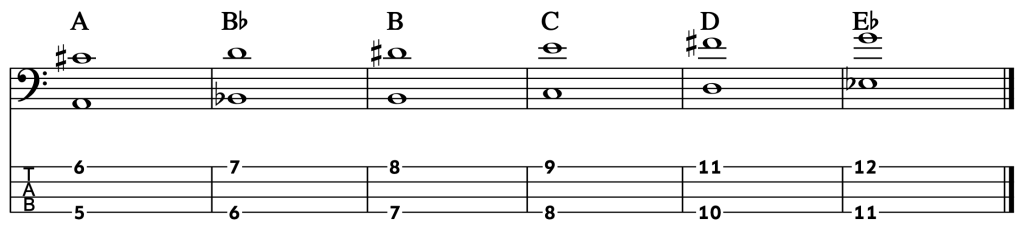
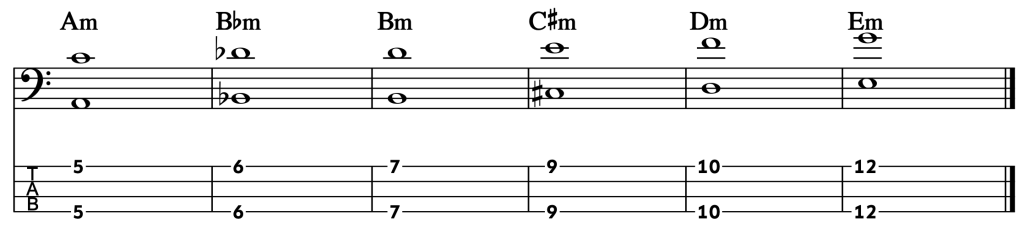
#2Major And Minor Thirds

Major Third
Minor Third
Songs that use thirds
(And Power Chords Together!)
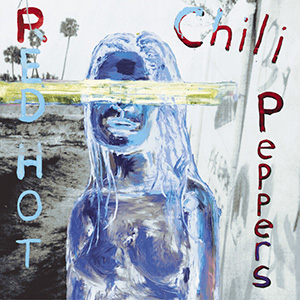
Fight Fire With Fire ![]()

Schism ![]()
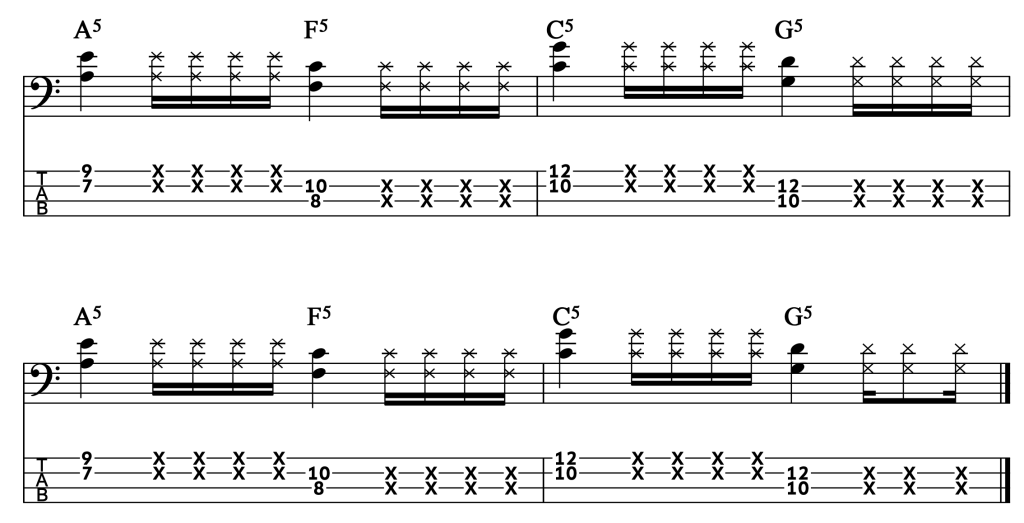
Schism uses power chords, thirds, and he even throws in a new one – the fourth:
The Fourth

Carousel ![]()
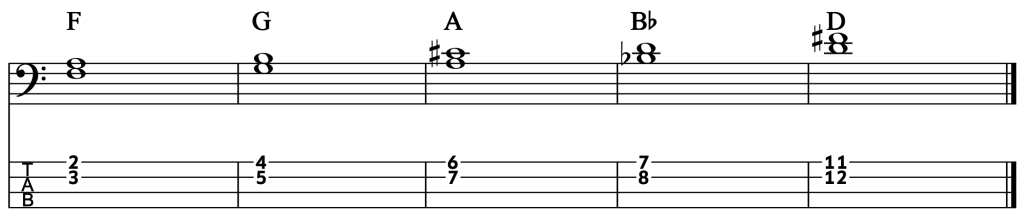
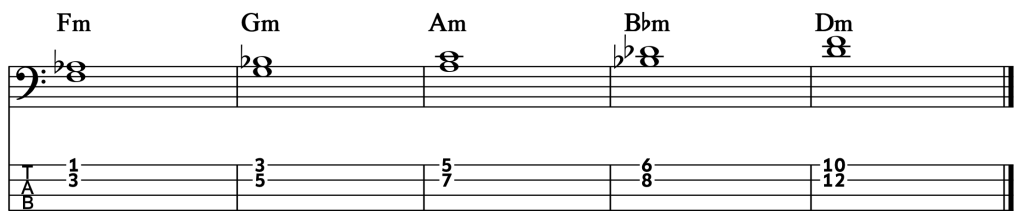
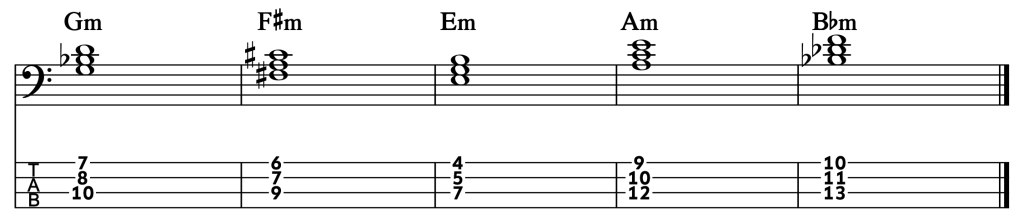
#3Major And Minor Tenths
These chords have the same notes as the major and minor thirds. The difference in sound and name comes from the change in the distance between the notes.
A tenth is a third one octave higher. Same notes, different way to play them.
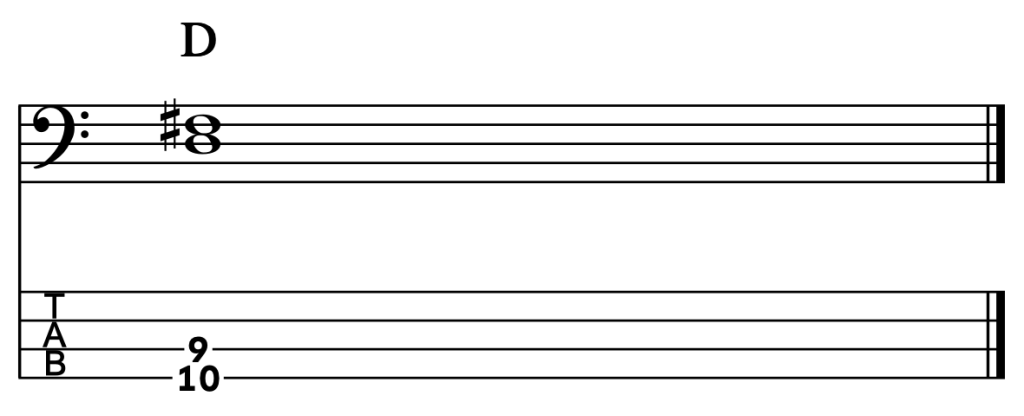
If you take that 3rd note and move it up an octave, it becomes this:
Songs that use tenths
Watermelon Man ![]()
Heaven Knows I’m Miserable Now ![]()


In case that playalong (and Morissey) got you sad, cheer yourself up by checking out our completely free Kickstart Course!
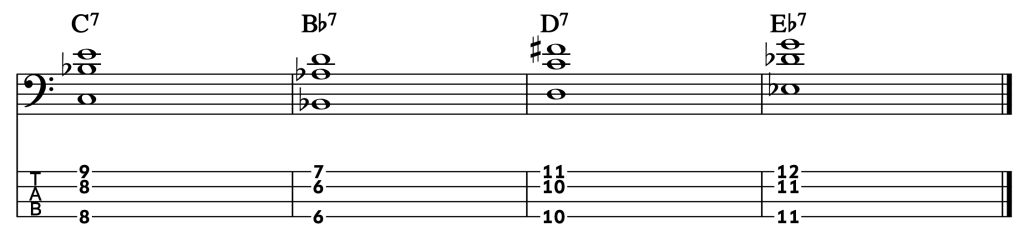
#4Major And Minor Triads
The world of 3 note chords is a much more complex and challenging place than the land of 2 note chords.
Not easy stretches for anyone.
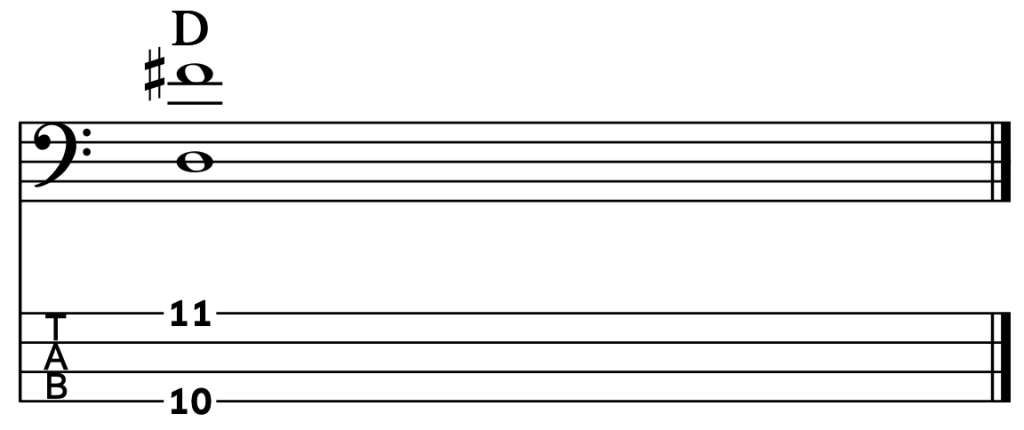
There is another way to play these. You can smash together two other shapes – the power chord and the major (or minor) tenth:
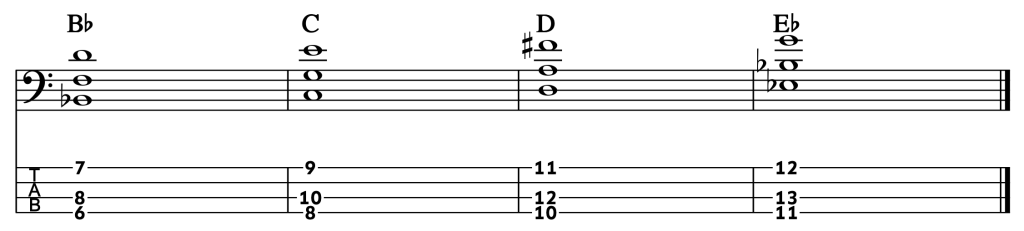
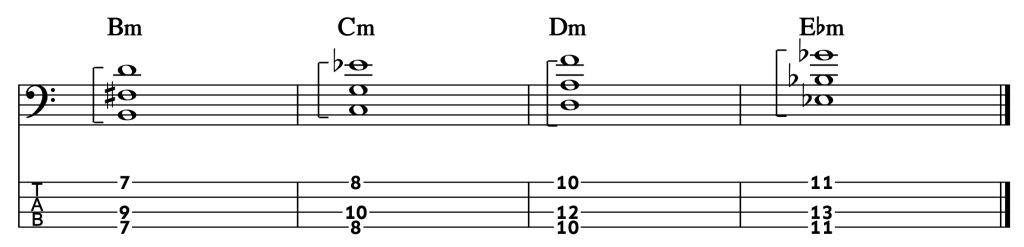
If you play a power chord on the E string and put the major or minor 10th on top (on the G string) now you have another way to play the triad.
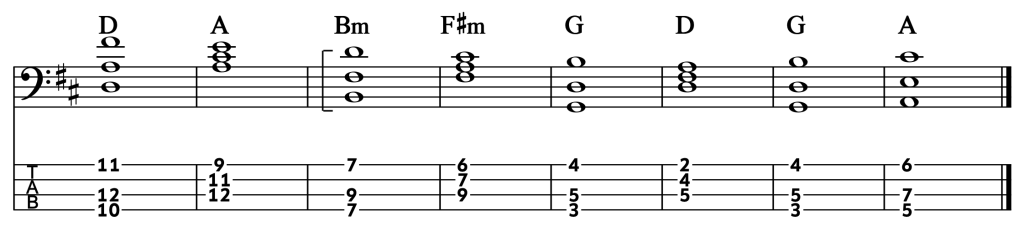
Here are two ways to play the chord progression from Pachelbel’s Canon in D.

For this next option, you’ll use a combination of triads with the root note on the A string and the E string. The change of chord fingerings allows for easier shifting from one chord to the next, and keeps the highest note (the melody) sounding more like the actual melody to Pachelbel’s Canon.
#57th Chords
Learning bass chords isn’t just about using them in songs. They can also help you hear what chord progressions sound like, so you can play better bass lines.
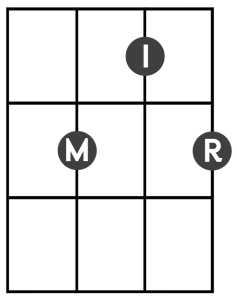
The Major 7 Chord
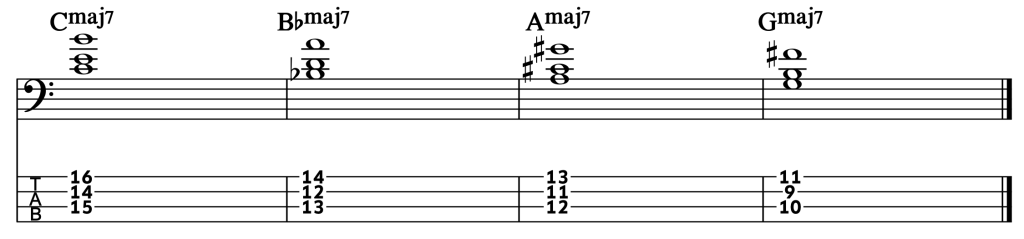
Again – if we begin with our shape of the major 10th, we can play the same 3 notes like this (by moving the third up to the 10th):
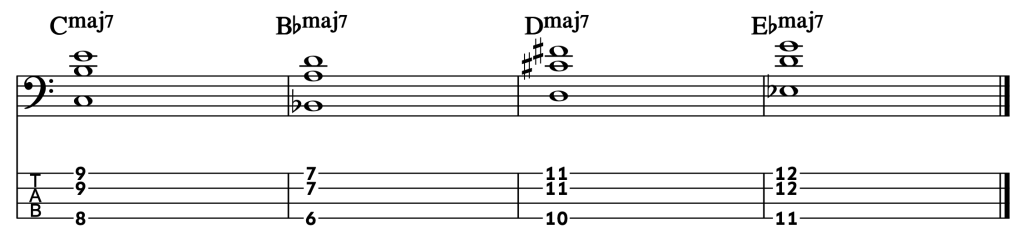
This chord shape can be used as a simple way to play the following chords you may find on a song sheet:
- Maj 7
- Maj 9
- Maj 7 #11
- Maj13
- Maj13 #11
Dominant 7 Chords
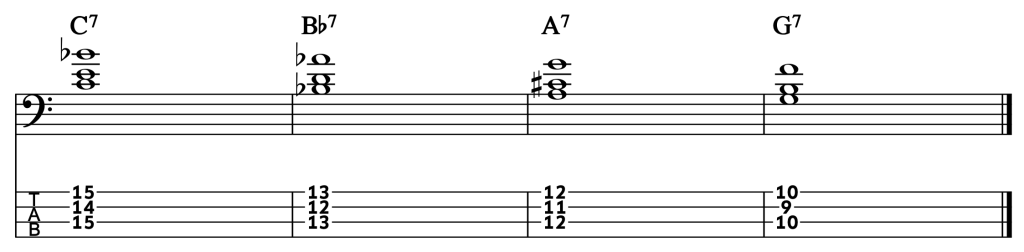
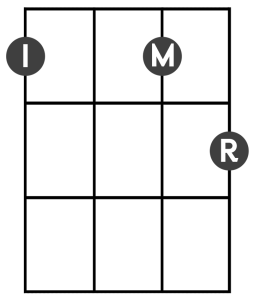
This chord can be used as a simple way to play these chords you may find on a song sheet:
- 7
- 9
- b9
- #9
- #11
- 13
- Alt
- 7(b5)
- 7(#5)
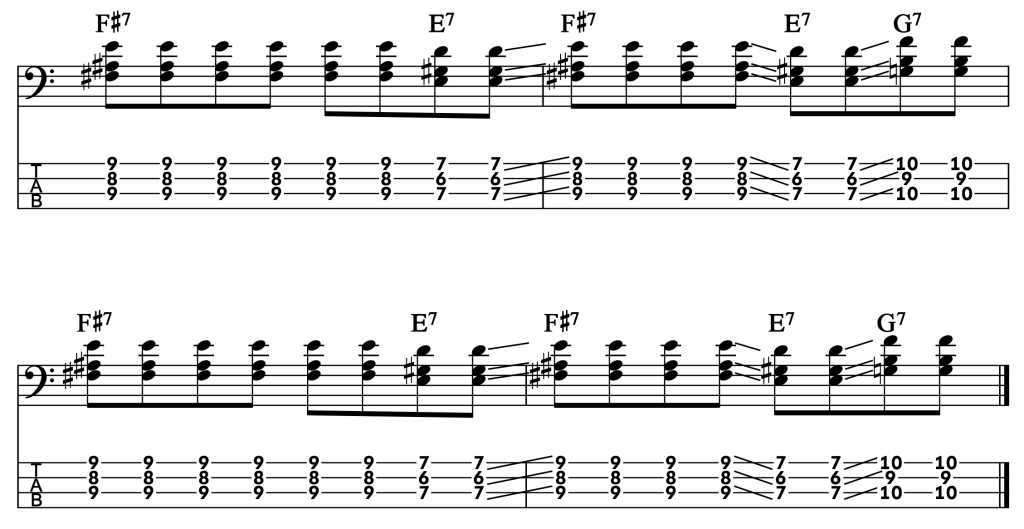
Check out Les Claypool’s intro to Golden Boy (from Primus’ The Brown Album). It’s all this chord shape:
Minor 7 Chords
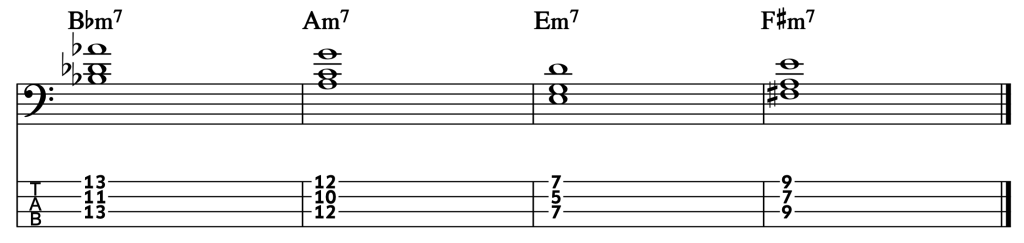

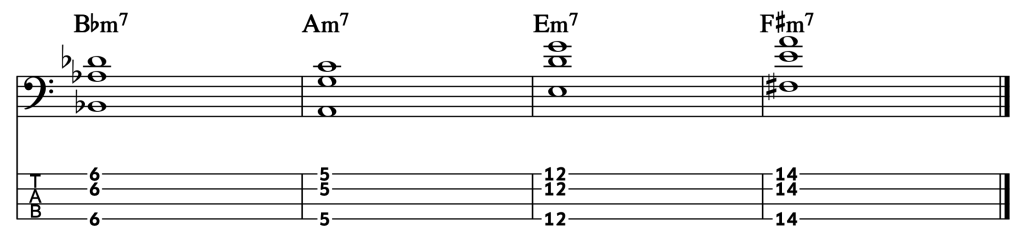
This chord can be used as a simple way to play the following chords you may find on a song sheet:
- min7
- -7
- m7
- Min9
- Min11
- Min13
Using These Chords
One of the greatest benefits of having these chord shapes under your fingers is the ability to hear and play chord progressions.
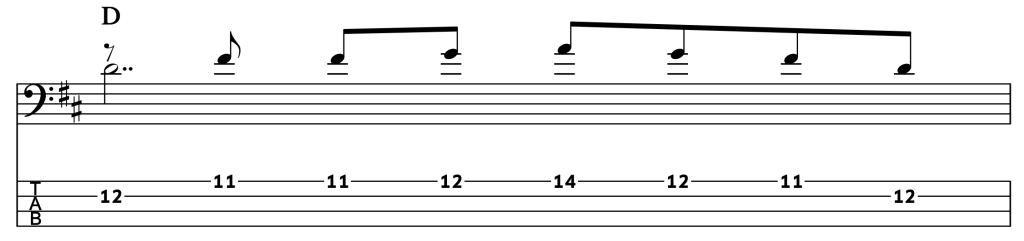
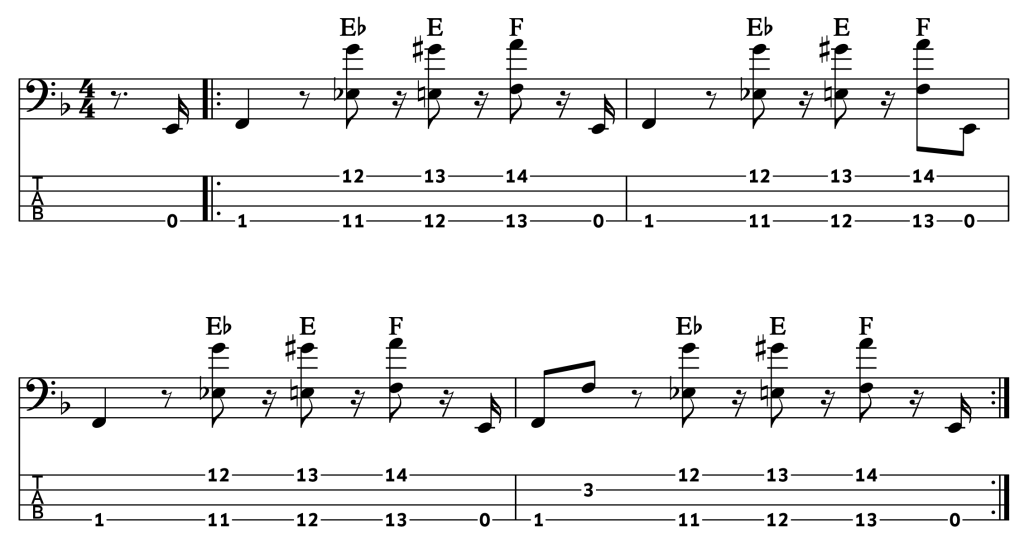
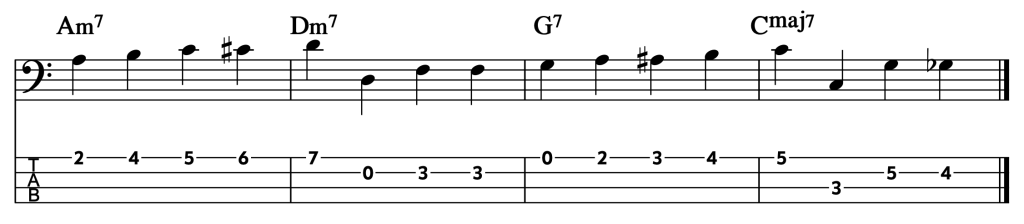
In The Ghetto by soul legend Donny Hathaway, the bassist, Willie Weeks, plays this killer bass line:
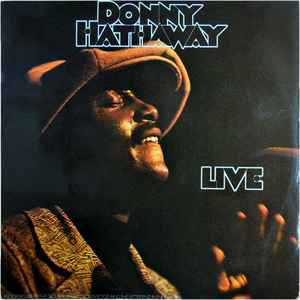
Now that you know all these chords, you can play both the bass line and the chords, which are usually written above the music notation.
If you wanted to play chords to The Ghetto, here are two recommended chord fingering options:
Version 1:
Version 2:
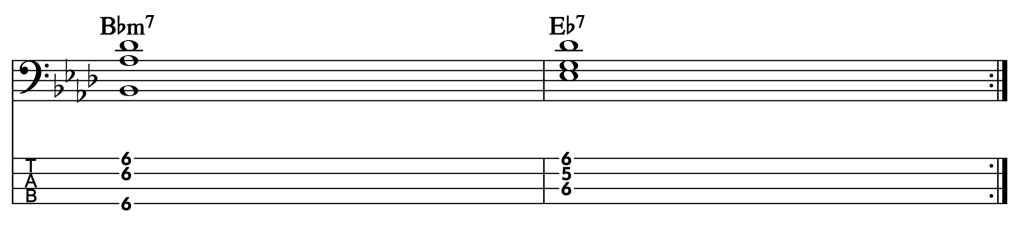
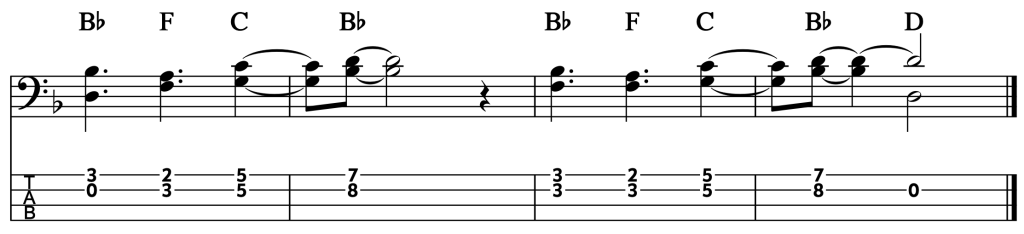
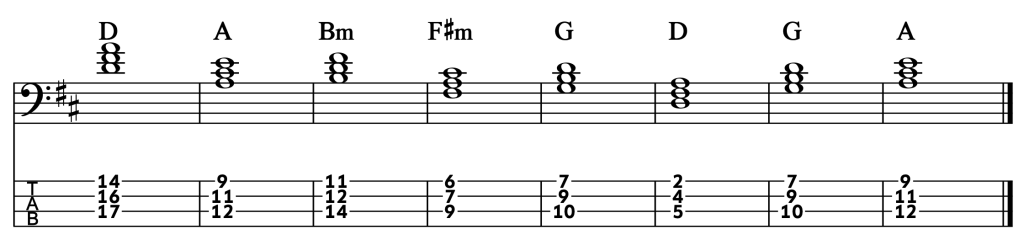
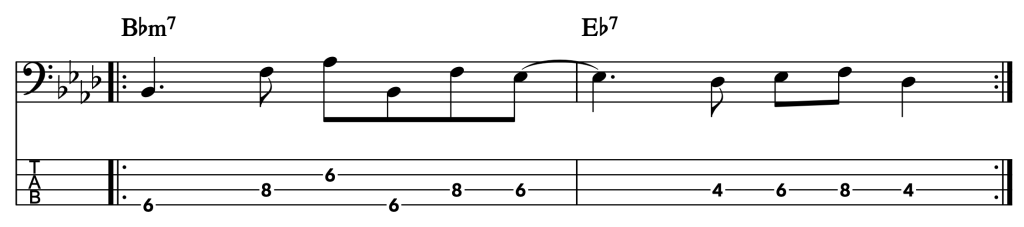
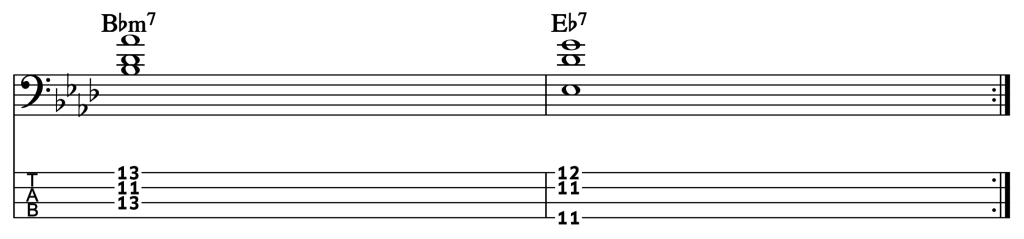
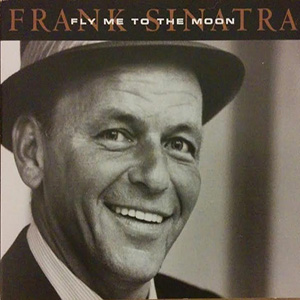
For another good chord example, let’s take the first four bars of the jazz classic (as made most popular by Mr. Frank Sinatra), Fly Me To The Moon.
Here is what the first 4 bars of music would look like if you were to encounter it in a song book or out on a gig:

Traditionally, when playing jazz, it is assumed you know how to improvise a walking bass line that fits the chords shown above the melody.
I’ve transcribed the recorded walking line from Sinatra’s version right here:
Now that you know these chords, you can play through the harmony to hear the full context of what’s happening in the song, rather than just playing the single note bass line.
Here are two ways to play it.
Variation 1:

Variation 2:

Technique Tips
In order to get multiple notes to ring out at the same time you’ll have to adjust how you play with both your fretting hand and your plucking hand.
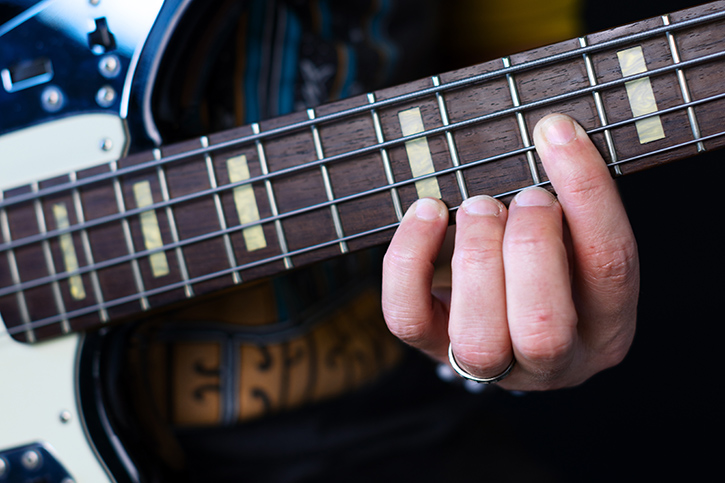
The Fretting Hand
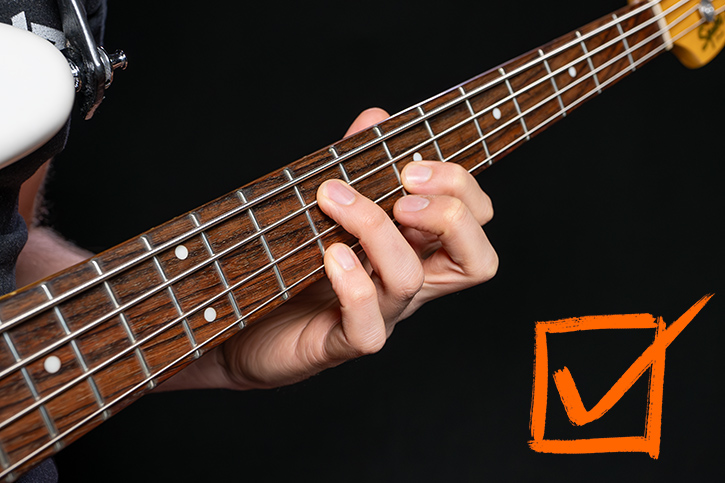
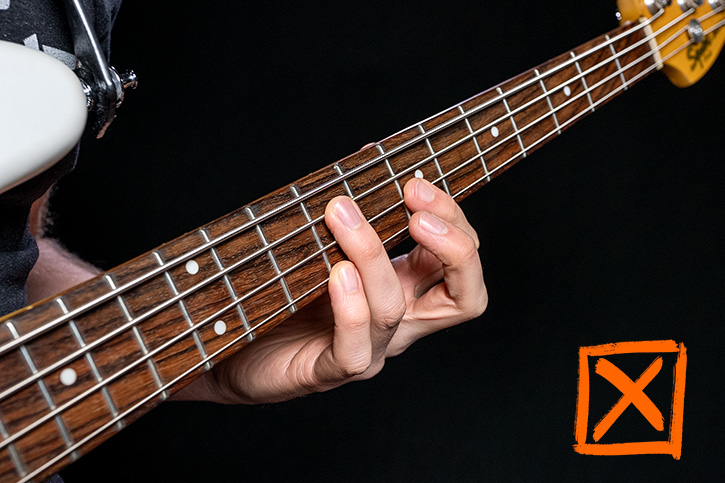
1. The fingers
If you want two (or more) notes to ring out together, you have to be careful that no part of your fretting fingers are obstructing, muting, or otherwise touching the strings between the fret and the pickup.
In order to get this kind of accuracy and clean contact with multiple notes at the same time, your fingers will have to curl down to the fretboard and fret the bass with the fingertips only. No straight fingers, no fingers smooshing down on multiple strings.
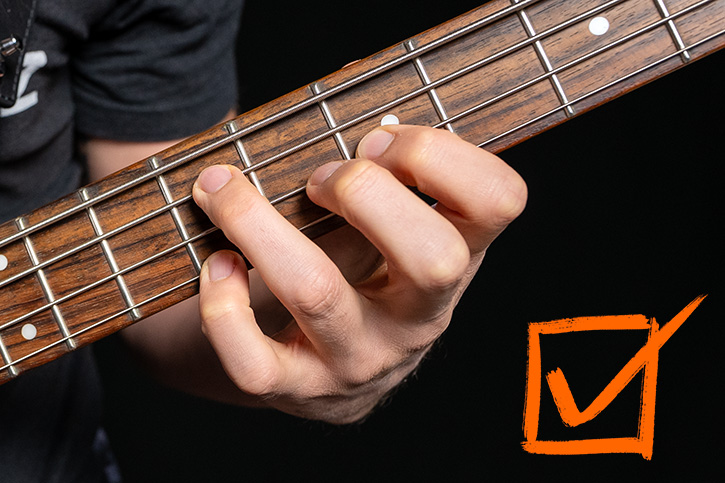
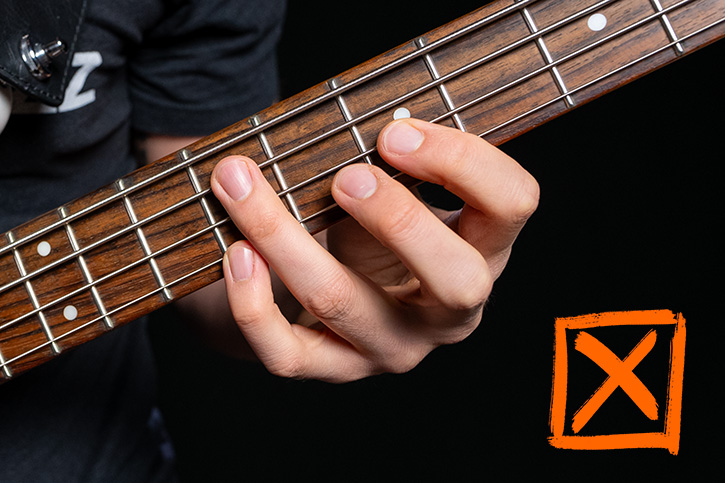
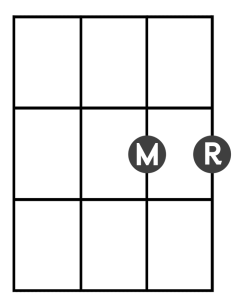
2. The hand & wrist
When you want to play chords, you’ll sometimes be asked to play notes on separate strings but the same fret – essentially stacking up your fingers.
To do this you must angle the wrist a bit.
The movement starts at the shoulder – pulling the elbow slightly away from the body. This allows you to roll the pinky side of your fretting hand away from your body slightly. When you do this, your fingers move from being in a horizontal row and move to being more of a stack, making it easier to access some of the chord fingerings you’ll find here.

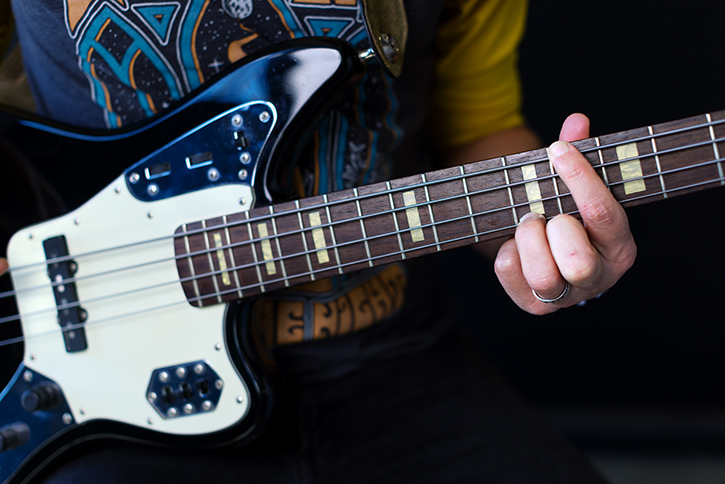
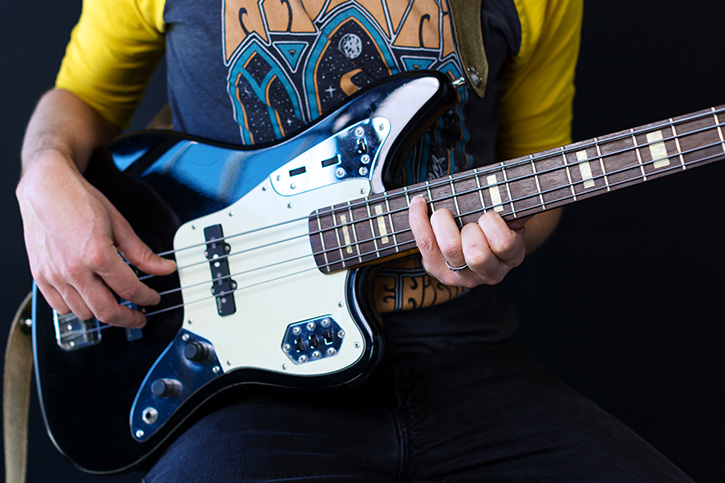
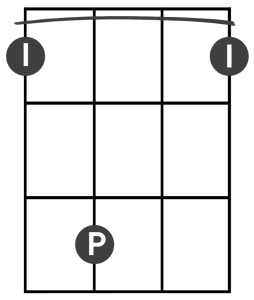
Plucking Hand
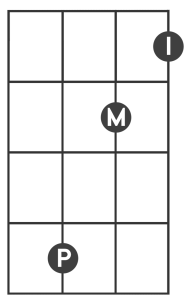
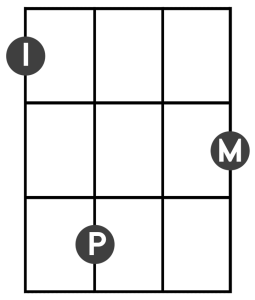
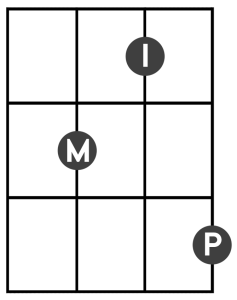
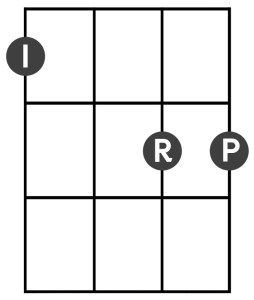
I’ll show you 3 options for your plucking hand so that you can play 2, 3, or even 4 strings at a time and have them all ringing out together.
Option #1
Fingerstyle ![]() Guitar technique
Guitar technique
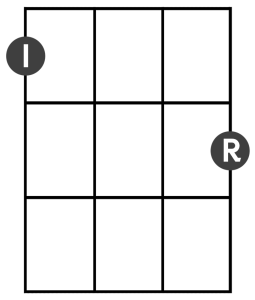
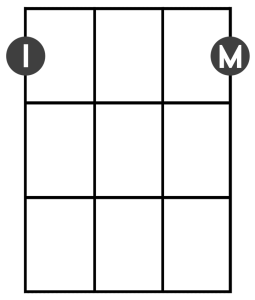
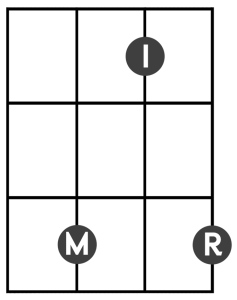
To do this, use the thumb of your plucking hand for the low string of your chord, and then add as many of the fingers of your plucking hand as you have extra notes in your chord.
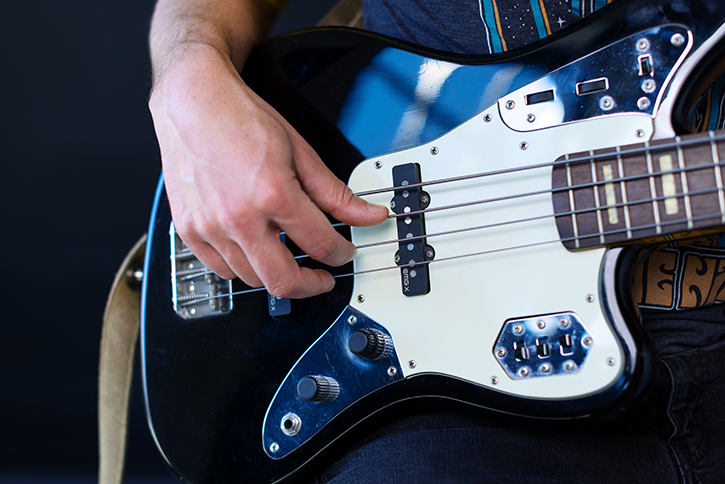
For a 2 note chord, use thumb and index – thumb on the lowest note, then index.
For a 3 note chord, use thumb, index and middle finger, thumb on the lowest, then index, then middle.
For a 4 note chord (if you ever need to play one), use the same approach, and add the ring finger.
When you’re plucking strings with this fingerstyle technique, your fingers will come up, through the string and away from your bass. THE OPPOSITE of good single-note technique.
You have to play like this in order to avoid hitting and thus muting other strings that need to ring out in chord playing.
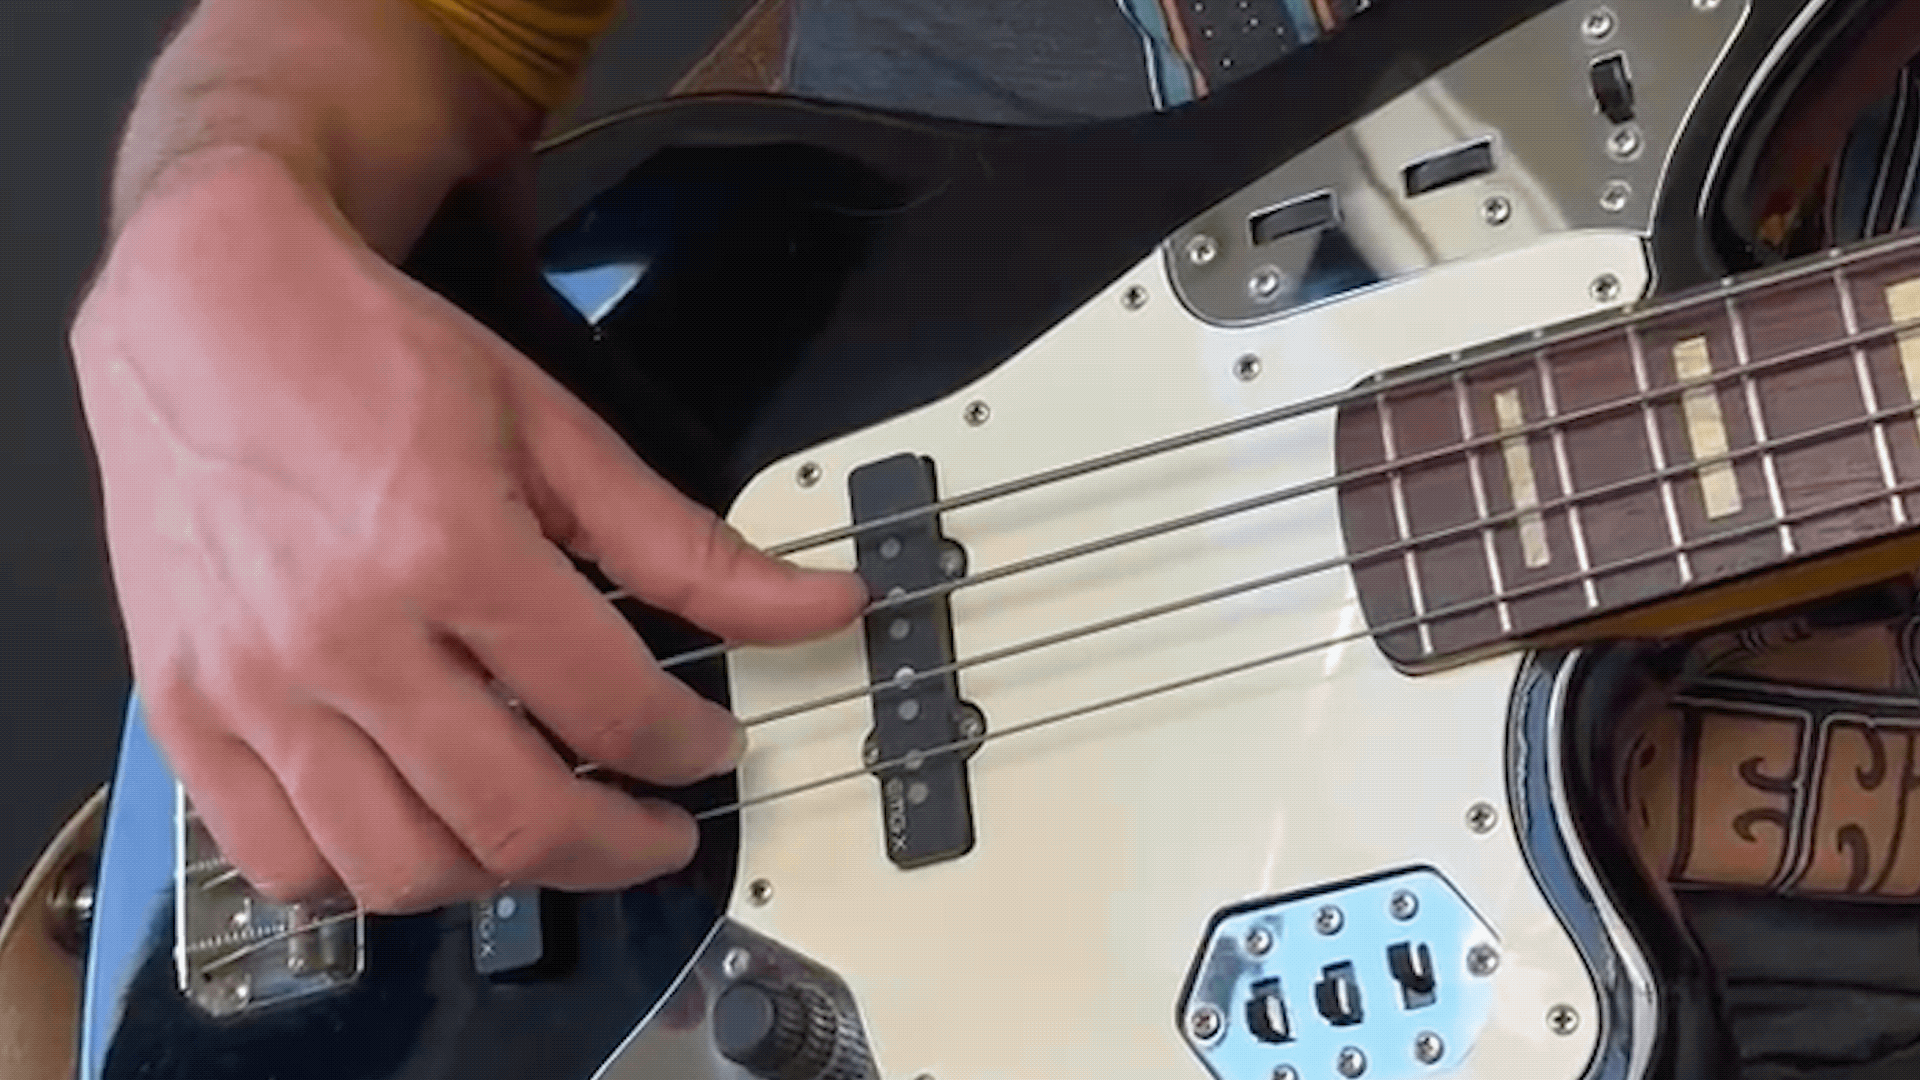
Option #2
Grab A ![]() Pick!
Pick!
I hold my pick between my thumb and the pads of my index and middle finger. Other pick players hold the pick between their thumb and the side of that topmost joint of their index finger.
I say – hold it how you can, and how it’s comfortable.
As a rule of thumb, strong beats will be a down stroke (moving your strum towards the floor) and weaker beats will be up strokes (moving your strum towards your chin).
Option #3
The Finger ![]() Strum.
Strum.
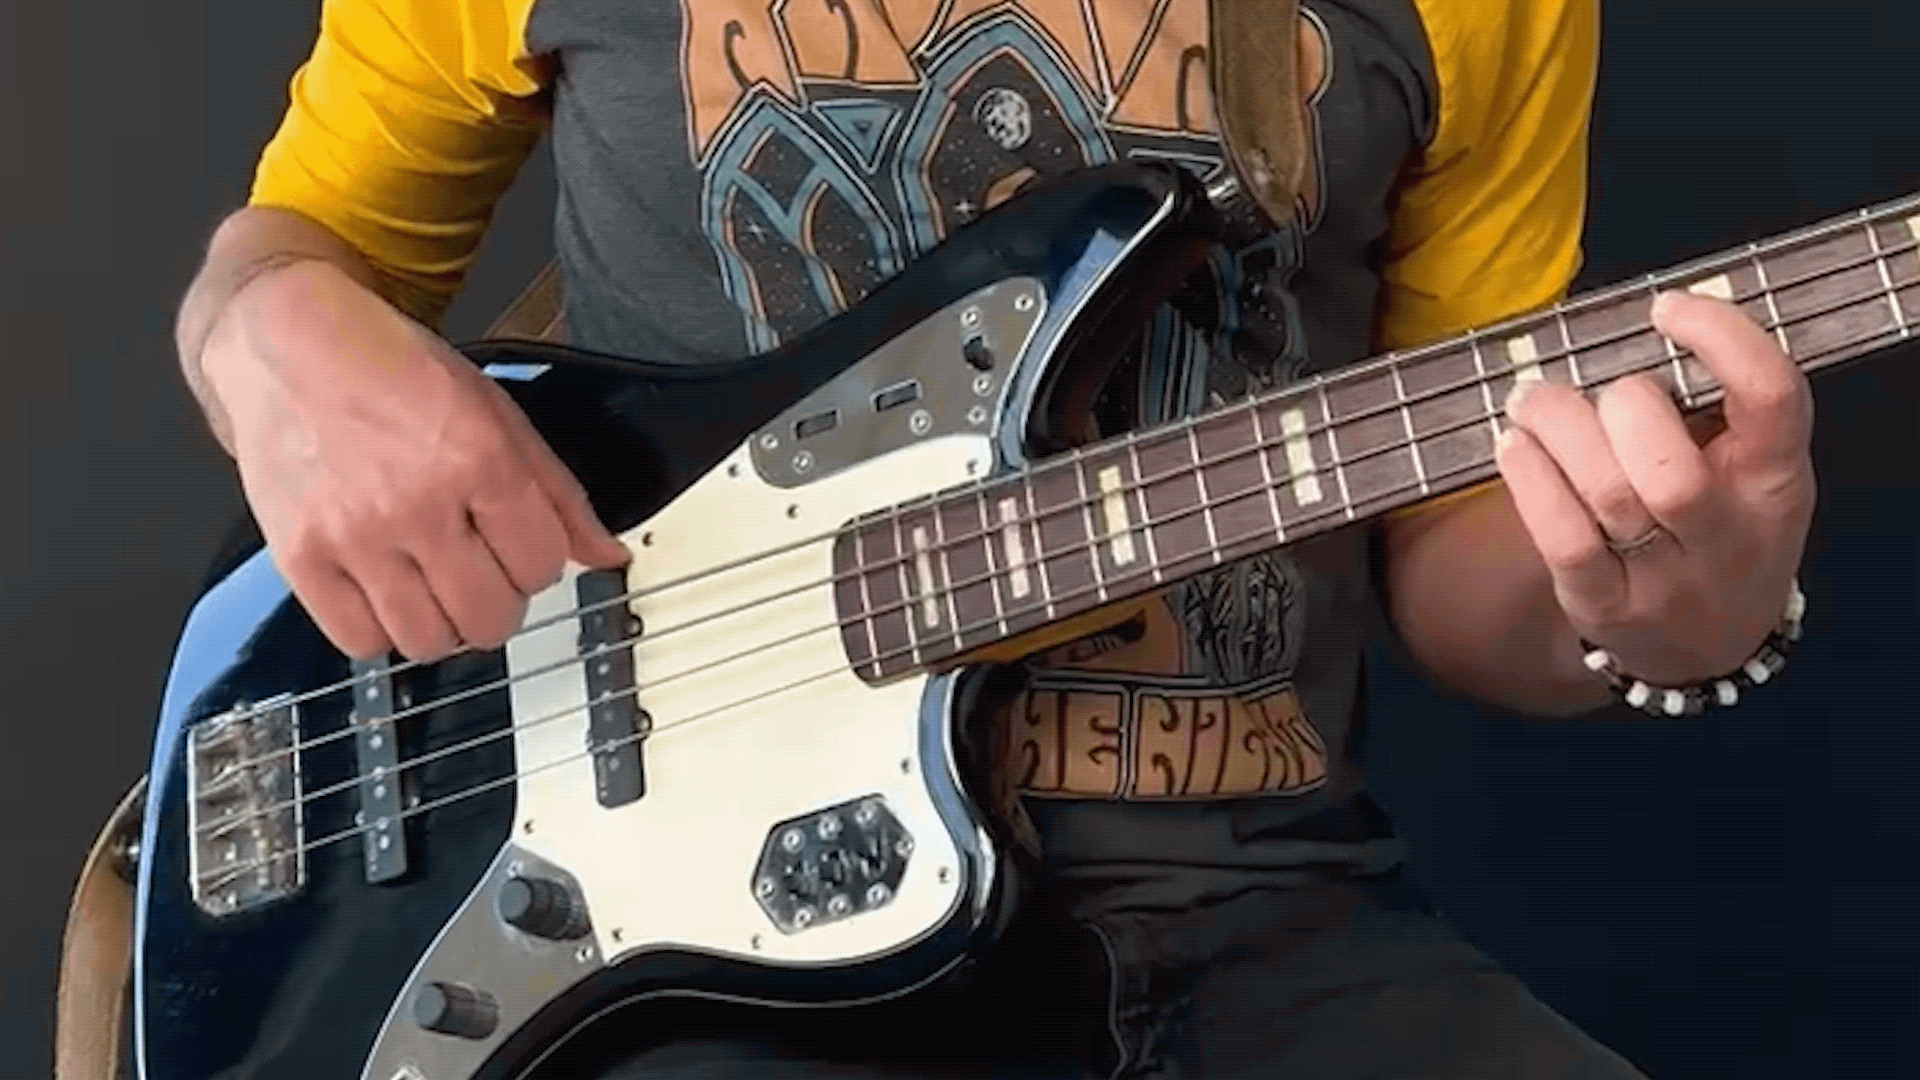
Using the index, middle and ring finger of your plucking hand, start from a very loose fist position and then flick the fingers out and down across the strings.
This is the equivalent to a down stroke with a pick.
For the up stroke, use your index finger, and quickly strum across the strings, recovering back into the starting position.
For the back and forth strum, it’s a combination of 1 to 3 fingers for the flick (down stroke) and usually just the index finger for the up stroke.

Comments
Got something to say? Post a comment below.